Foolproof Flaky Biscuits + Video
The secret to Foolproof Flaky Biscuits is revealed! Find out how to get flaky, layered, buttery, tender biscuits you will swoon over!

One of my husband’s favorite breakfasts is biscuits and gravy. I don’t make it very often because I haven’t had the best luck and getting a tall, flaky biscuit worth making again and again. I have since learned the secret to flaky biscuits doesn’t necessarily lie in the recipe alone, but that the technique also helps get you those amazing, buttery layers! It really is foolproof!

I’m talking crisp exterior, peel apart layers, and a tender center! Did I mention these are oh so buttery?! Swoon! Slather on some apple butter, jelly or jam, butter and honey, whatever your pleasure, and enjoy these biscuits ASAP!
Save This recipe
Enter your email below to get a link to this recipe emailed straight to you to save later! Plus be signed up for all new recipes.
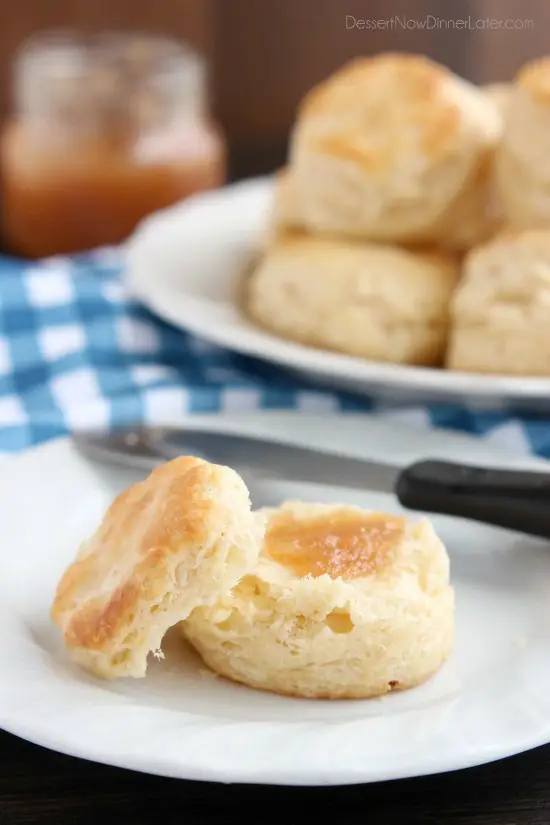
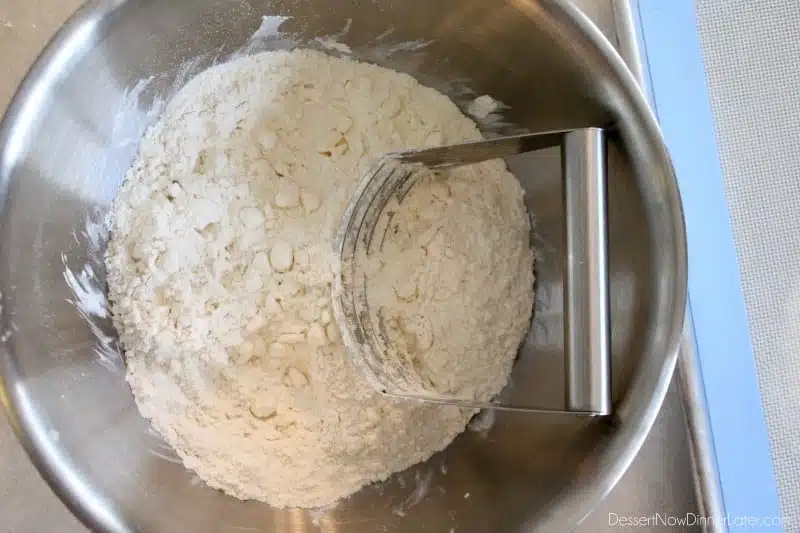
Let me show you how to get the foolproof flaky layers… First off, it’s really important to have COLD butter when you make biscuits (or pie crust) because when the butter melts, it creates pockets of air to help make those flaky layers. Also, don’t crumble them all away. Pea size butter pieces are ideal.
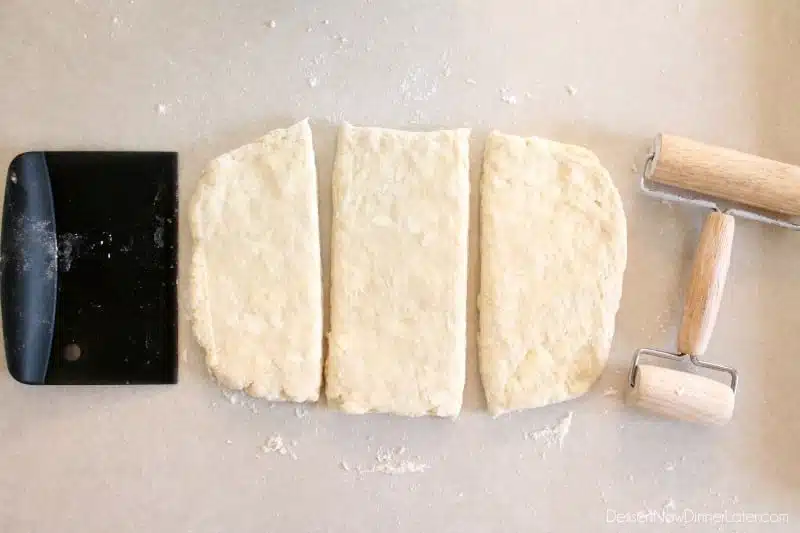
After you add the buttermilk and the dough comes together, roll it out into roughly a 6×9-inch rectangle on a lightly floured surface. Then cut that rectangle into thirds.
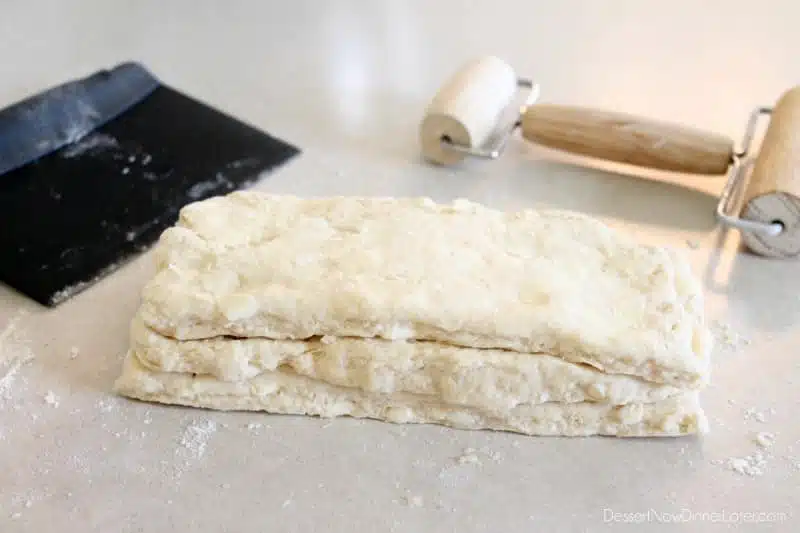
Here’s the trick! Stack each third on top of one another and roll the dough into a 6×9-inch rectangle again. This helps ensure you get those tall, flaky layers!
Using a 2 1/4 or 2 1/2-inch biscuit cutter, cut 9 (maybe 10) biscuits and place them on a silicone lined baking sheet. Do your best to piece together the scraps and use up all the dough with the layering technique, without overworking the dough or melting the butter with your warm hands.
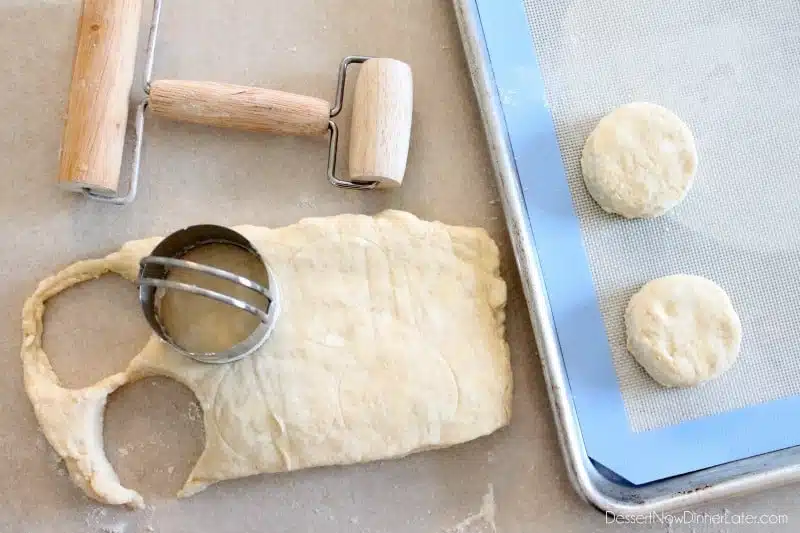
If any of the edges kind of stick down, I stretch them before baking to help make sure they will grow tall and flaky. You can see in the picture below that they are pretty thick to start with, about 1 1/4 to 1 1/2-inches tall, and you can see some chunks of butter and layering before they even go in the oven.
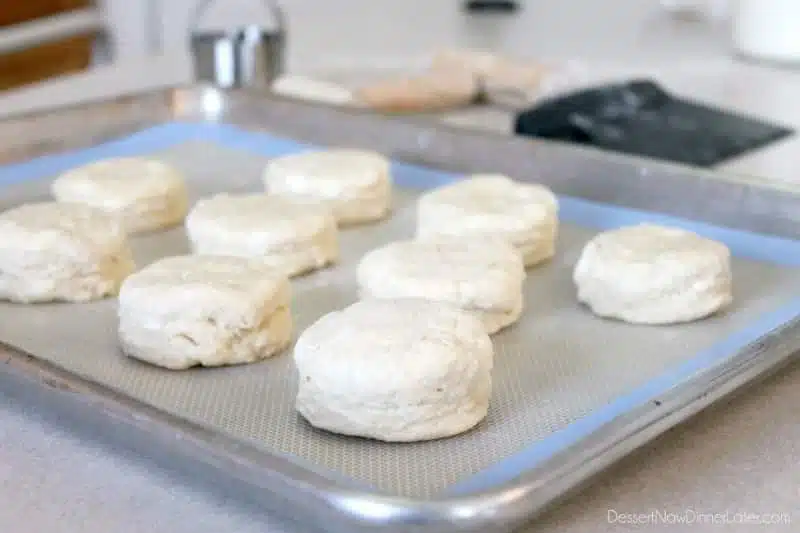
Bake at 450 degrees Fahrenheit for 10 to 12 minutes or until golden brown on top and bottom. These are best enjoyed warm and crisp from the oven, but you can store leftovers in a zip-top bag for 3 or 4 days. I like to re-heat my leftover biscuits, one at a time, in the microwave for 10 to 12 seconds.


Foolproof Flaky Biscuits
Ingredients
- 2 cups (240 g) all-purpose flour, (stir, spoon & level)
- 1 Tbsp granulated sugar
- 1 Tbsp baking powder
- 1 tsp salt
- ½ cup (113 g) unsalted butter, cold, cut into Tablespoons
- ¾ cup (177 ml) buttermilk, cold (or milk plus 1 tsp of lemon juice/white vinegar; allow to sit for 5 minutes before using)
Instructions
- In a large bowl, mix the flour, sugar, baking powder, and salt.
- Cut in the butter with a pastry blender until pea size pieces.
- Add the cold buttermilk all at once and form into a ball.
- Roll dough onto a lightly floured surface, into a 6×9-inch rectangle. Cut the rectangle into thirds.
- Stack each third on top of one another and roll the dough into a 6×9-inch rectangle again.
- Using a 2¼ or 2½-inch biscuit cutter dipped in flour, cut 9 (maybe 10) biscuits and place them on a silicone lined baking sheet. Do your best to piece together the scraps and use up all the dough with the layering technique, without overworking the dough or melting the butter with your warm hands. (If any of the edges kind of stick down, I stretch them before baking to help make sure they will grow tall and flaky.)
- Bake at 450 degrees Fahrenheit for 10 to 12 minutes or until golden brown on top and bottom.
Video
Notes
- Store any leftovers in a zip-top bag for 3 or 4 days. I like to re-heat my leftover biscuits, one at a time, in the microwave for 10 to 12 seconds.
Did you make this?
Don’t forget to leave a rating below and make sure to follow on Pinterest and Instagram for more!








Made your recipe as printed and it turned out with wonderfully, flaky biscuits just as you said and although I used lemon juice and milk instead of real buttermilk, I wouldn’t change another thing.
This is definitely the recipe I’ll be using from now on.
Thank you for sharing,
Edie C.
I’m glad you enjoyed this recipe Edie! Thanks for sharing your review!
I’d give this recipe 10 stars if I could. They were amazing! They tasted just like the ones my grandmother used to make. Hubby said it was like eating dessert with his meals. I will never try another biscuit recipe again.
Wow! Thank you! So glad they were a hit!
If you make these biscuits, reduce the salt to 1/2 tsp. After trying to eat just one, I had to throw them out because they were sooooooo salty.Personally, I would reduce the salt to 1/4 tsp, but some people like a little more.
These are the best ! So easy. They warm up nicely. I like to split them the next day and toast on skillet.
Making a good sausage gravy for these is relatively simple but takes longer than the biscuits. Use a 12 oz to 16 oz package of pork breakfast sausage. (I make my own breakfast sausage in my kitchenaid mixer using fresh ground pork) but any breakfast sausage you like will work great for this.
Fry the sausage in a pan (I use a chop stir to break the sausage up into a finer crumble)
When the sausage is fried and browned – pour off the grease – you don’t need a lot of fat here.
Return the pan to the stove.
Now sprinkle about 1/4 to 1/3 cup of flour on the sausage – depending on the amount of sausage you started with you may even want more. Stir it and let this flour absorb the flavor of the sausage – keep frying the mixture do not use a high heat here! Once this is brown, grab a spatula and stir in cold milk – it should be thick at first but pour enough in to thin it out – then cook it slowly to get the flavor throughout the gravy. If you get it too thin, you will have to mix some flour in cold milk prior to adding it to the heated gravy. The trick to excellent gravy is to cook it down until it reaches your desired thickness. Remember this is a bit more work than using a packaged gravy but it is WAY better.
These came out delicious! I used the milk with lemon juice and they are still tasty. Mine were on the ugly side but I dont have a rolling pin or cookie cutter so I used a glass cup. Will definitely make these again! (and double everything) 🙂
Glad you got them to work out with what you had and that they were tasty!
Good Morning I live in Canada was raised in the Deep South in Georgia I’m wondering if this will work with plain flour salt and baking power we don’t have self rising flour in Alberta thanks!
Yes, this recipe actually uses all-purpose (not self rising) flour. Everything you need is in the printable recipe card. Enjoy!
Amber I notice some of the comments to freezing the dough my question is it okay to make the day before and storing in the refrigerator. I want to make some for my co-workers but trying to make the ahead of time and in the morning bake the biscuits.
You’ll lose a lot of the leavening power if you mix all of the ingredients together ahead of time. I would mix the dry ingredients, cut the butter into them, and then add the buttermilk right before you want to shape and bake them. They are pretty quick to throw together.
Amber..can I make these in the morning and bake them for dinner? Cover them in the fridge with a pastry cloth all day?
They might not rise as well, but you can give it a try.
I just made these and can’t wait to taste them! They have a good bake but for some reason they didn’t rise very much. Any ideas??????
Really? You used baking powder, not baking soda right? If you are very high altitude, you could try decreasing the amount of baking powder by 3/4 tsp and increasing the temperature 25 degrees Fahrenheit, but I’m high altitude (4500′) and haven’t had any problems.
THANK YOU for the high altitude tip. I almost forgot. I am at 6000 feet and need to remember to make adjustments. I am certain my granddaughters will love these flaky biscuits.
Thanks again!
Just thought of something else. You want the dough about 1 1/2-inches tall when you cut them into circles. So kind of thicker.