Easy Pie Crust
This Easy Pie Crust Recipe uses Crisco shortening, an egg, and vinegar for a foolproof pie crust that will hold its shape and create a perfectly flaky pie crust. With step-by-step photos to show you just how easy it is to make!
*My friend Brianne has a great Gluten Free Pie Crust, if you need it.
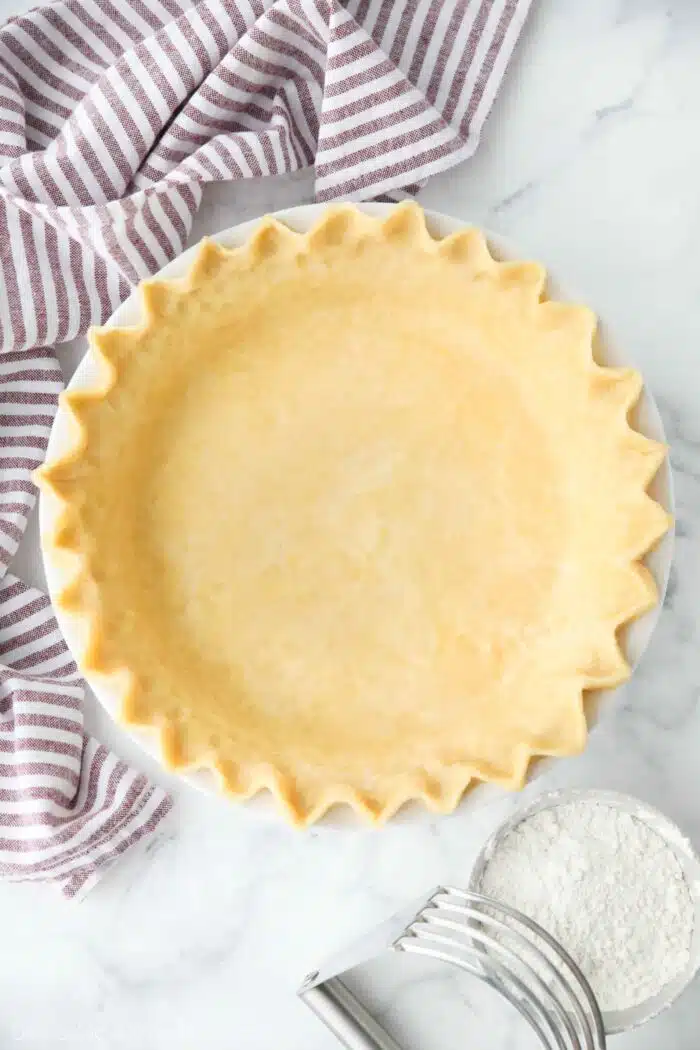
Why You Should Make This Recipe
- Easy Pie Crust Recipe: With simple ingredients and minimal equipment, you can create the perfect pie crust in no time at all. It’s easy to make and use to create the most beautiful pie crusts, worthy of your holiday meals.
- Practically Foolproof: This easy pie crust is more forgiving than a butter pie crust. Partly because it uses shortening, which has a higher tolerance to room temperature, but the egg also makes the dough more pliable and easier to roll out. While simultaneously adding richness to the crust.
- Extra Tender and Flaky Pie Crust: This recipe also uses vinegar, which slows gluten development and keeps the pie crust tender, instead of tough. Gluten is a protein that gives baked goods their stretch and chew. You want that in bread. NOT in pie crust.
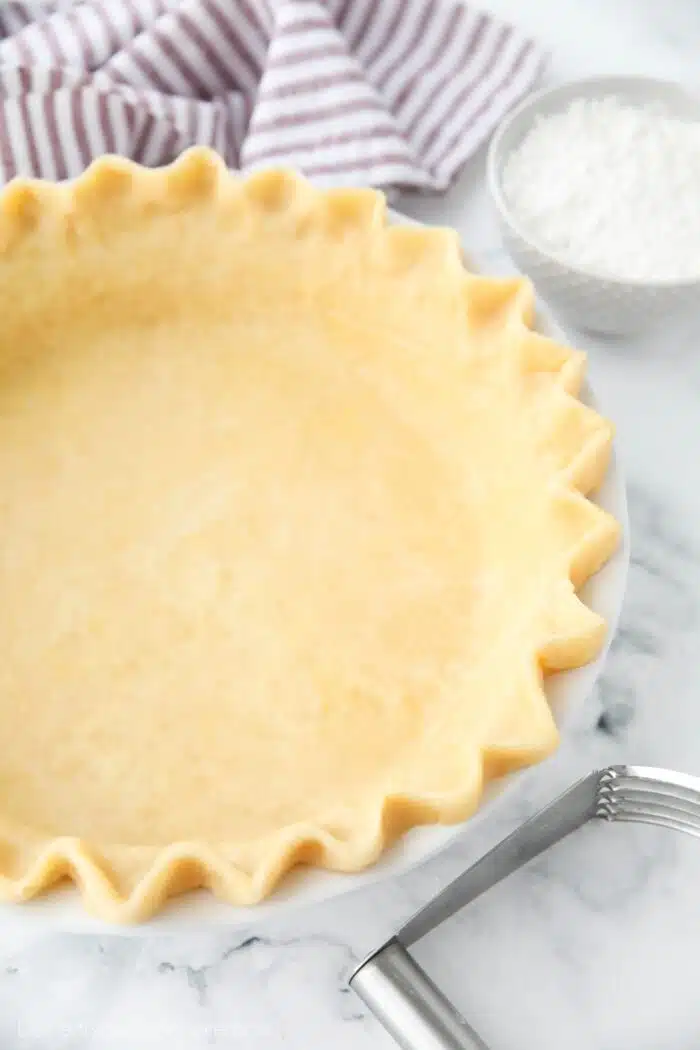
Easy Pie Crust Recipe
I get that a lot of people shy away from pie crust, but it is a lot simpler than you think. Especially with this perfect pie crust recipe. All you need is a bowl and your hands, but a pastry blender or fork works great too.
Save This recipe
Enter your email below to get a link to this recipe emailed straight to you to save later! Plus be signed up for all new recipes.
This is my favorite pie crust recipe. I can always count on it to not shrink or melt too quickly. This makes intricate pie crust designs more achievable with less chill time.
While an all butter pie crust is superior in flavor, it’s more delicate to handle, and this shortening pie crust recipe is simply more resilient and reliable.
This Crisco pie crust is also more beginner-friendly because shortening has a higher tolerance for warm hands and room temperature than butter, because butter has more moisture. Give it a try! I’m confident that even if you’re a novice, that you will be pleased with the outcome.
Ingredients You Will Need
*NOTE: Full ingredient amounts and instructions are in the printable recipe card at the end of the post.
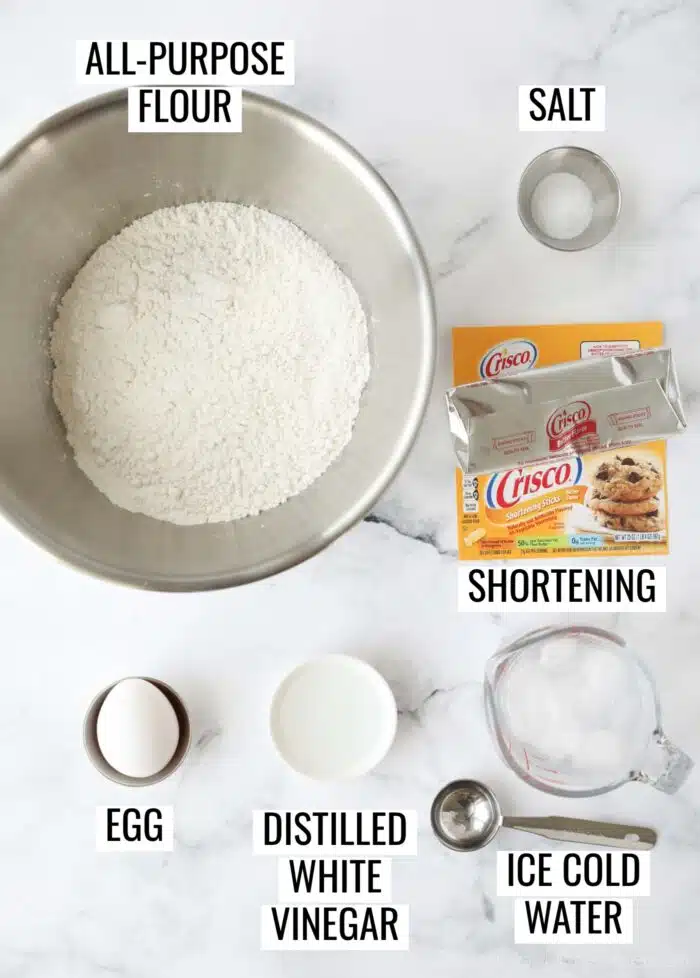
Although this pie crust recipe has six ingredients, those couple extra ingredients make a big difference.
- All-Purpose Flour – Creates the structure of the pie crust.
- Salt – Brings out the flavor. Regular table salt works great.
- Shortening – I use Crisco Butter Flavor All-Vegetable Shortening because it helps the pie crust taste more like a butter crust, while keeping the resilient properties of shortening. (Melts slower.) The shortening sticks are quite convenient if you don’t want to have to scoop shortening out of the tub.
- Egg – Makes the dough more pliable and easier to roll out while simultaneously adding richness to the crust.
- Distilled White Vinegar – No, you won’t taste it. Vinegar simply slows gluten development and keeps the pie crust tender, instead of tough.
- Ice Cold Water – This helps keep the fat (in this case, shortening) from melting before the pie crust goes in the oven. I like to fill a whole glass measuring cup with ice water.
How to Make the Perfect Pie Crust
*NOTE: Full ingredient amounts and instructions are in the printable recipe card at the end of the post.
- In a large bowl, stir together the flour and salt.
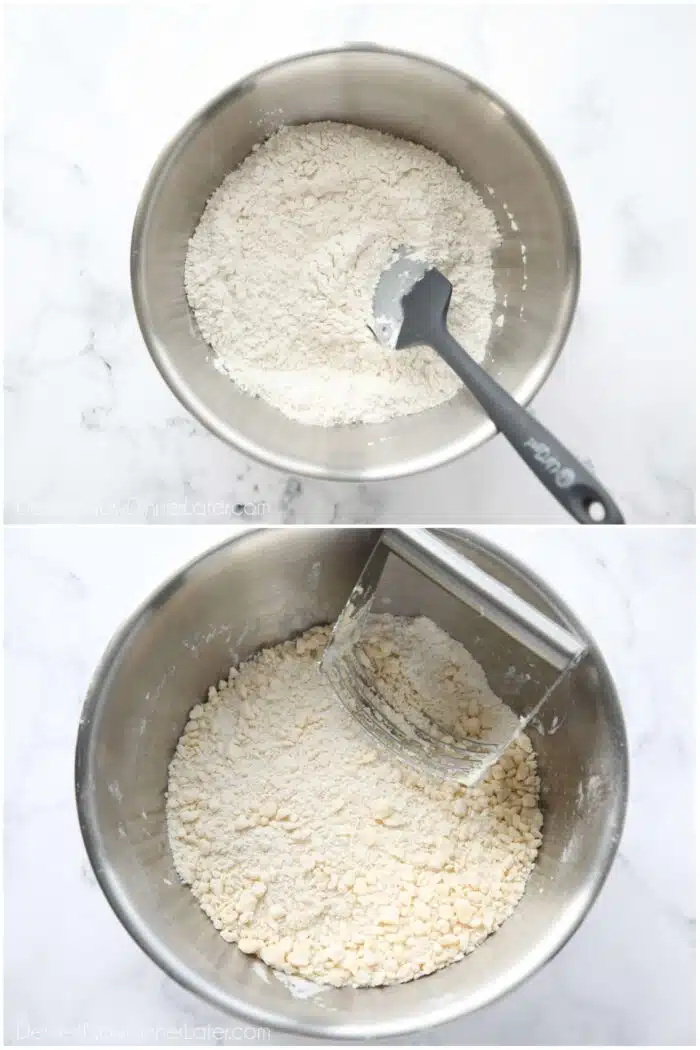
- Cut the shortening into the flour mixture with a pastry blender or fork until it resembles pea-size pieces with some course crumbs. (NOTE: Don’t cut the shortening into fine crumbs, or the crust will be crumbly instead of flaky. Those little balls of shortening are creating pockets of air in your pie crust, which become the flaky layers you want to achieve.) You can also break up the shortening into the flour mixture by rubbing it together with your fingers.
- Add the egg, vinegar, and 5 Tablespoons of ice cold water.
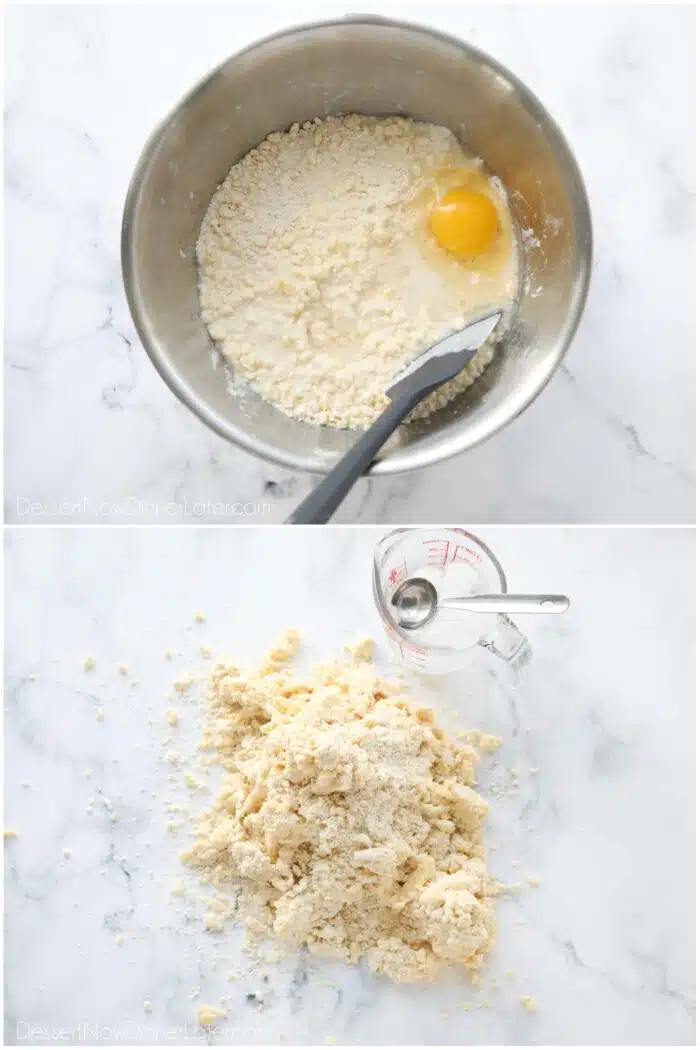
- Stir together with a spatula. Then empty the mixture onto the countertop and press/squeeze the dough together.
- Add extra ice cold water 1 Tablespoon at a time (usually only 1-2 Tablespoons more) pressing and squeezing until the dough just comes together. (NOTE: Do not add too much water and do not over-mix.)
- Once the dough comes together, divide the dough in half. (NOTE: If using a deep pie dish, make one half slightly bigger than the other.)
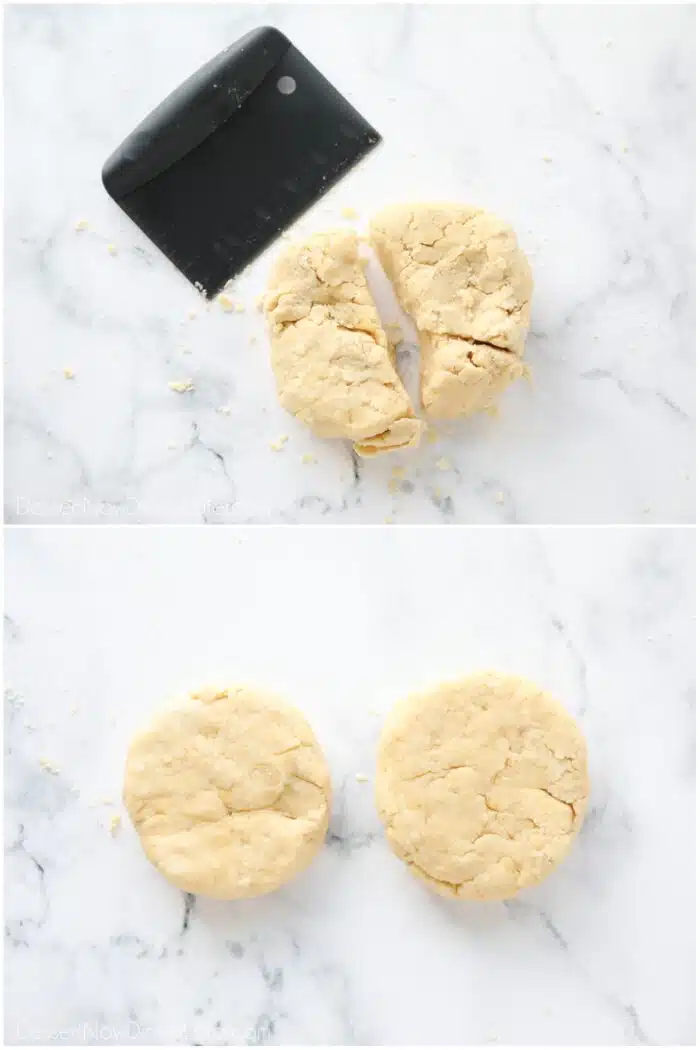
- Flatten each half into a round disk. Wrap each half tightly in plastic wrap and refrigerate for 30 minutes before using.
Refrigerating Pie Crust
Chilling the pie dough is imperative, as it relaxes the gluten and allows the liquid to absorb, which will result in less cracks, rips, and tears. Refrigeration also gives the fat (in this case shortening) time to firm back up.
If you’re quick, and your kitchen isn’t too warm, you can actually roll this pie crust with shortening right away and then flash freeze it for 10-15 minutes before you bake it. As always, work with one half at a time, keeping the other half wrapped and refrigerated in the meantime.
You can keep pie dough refrigerated for up to 3 days. After that it must be baked or discarded.
PRO TIP: If the pie crust has been chilled for longer than 1 hour, allow the pie crust sit out at room temperature just long enough to take the chill off before rolling it out. (About 10 minutes.) This will help to prevent cracks.
Freezing Pie Crust
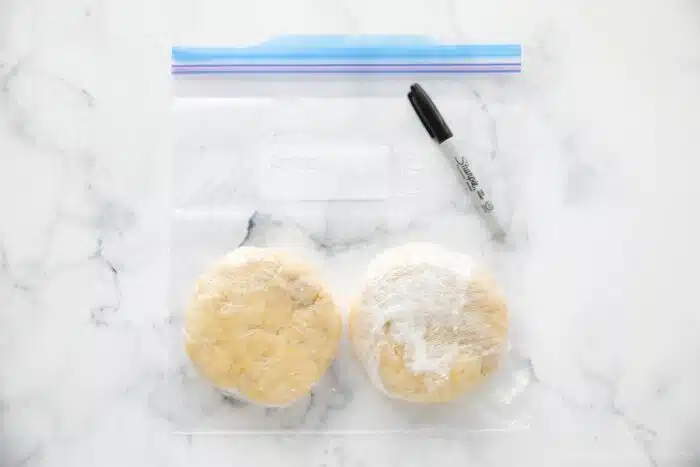
Pie crust can also be made ahead and frozen. Shape pie dough into a flat disk and double-wrap it in plastic wrap, then freeze it. You can place the wrapped pie crust(s) in a freezer bag for added protection. Be sure to label the pie dough with the date.
Freeze pie crust up to 3 months. Allow pie crust to thaw in the refrigerator overnight before using.
How to Roll Pie Crust
After the pie crust has chilled you can roll it out.
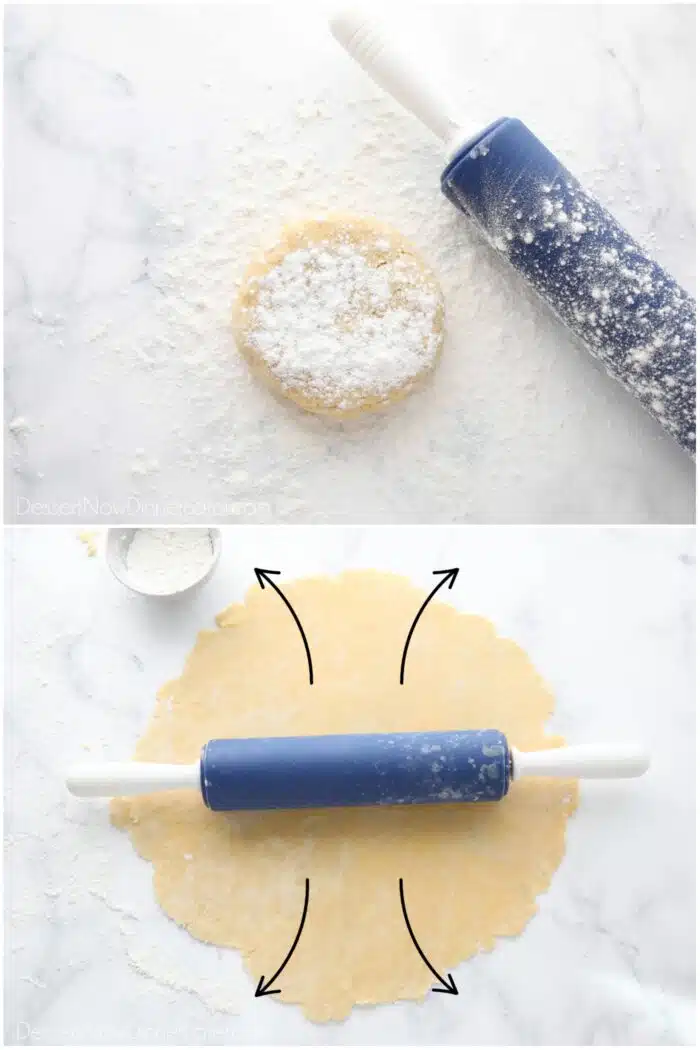
- Sprinkle flour over countertop, rolling pin, and pie crust.
- Use your knuckles to press the edges of the dough to prevent cracking when you roll it out.
- Begin rolling the crust from the center outwards in all directions. Rotating the crust after every few passes to prevent sticking. Add extra flour as needed.
- Continue rolling and rotating the crust until the dough is about 1/8-inch thick, and about 14-inches round. The final crust should look marbled with ribbons of shortening.
How to Transfer and Use the Pie Crust
After the crust has been rolled out, there are a couple ways to transfer the dough to the pie pan.
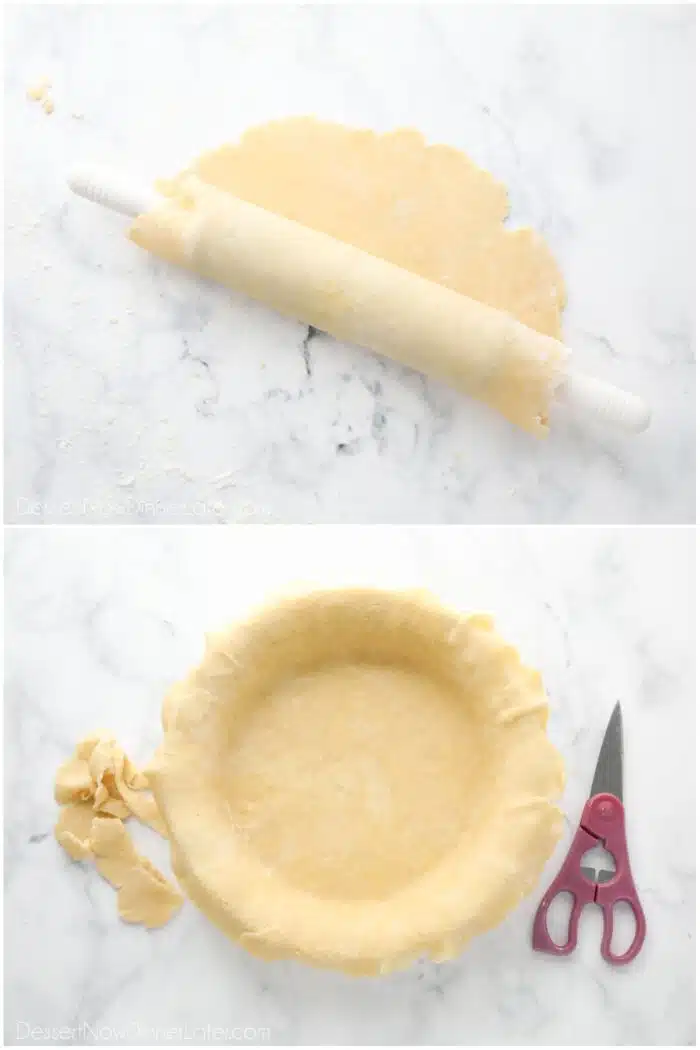
- Roll the pie dough around the rolling pin, then slowly unroll the pie dough into the pie pan.
- Or gently fold the pie dough into fourths. (Fold in half, then fold in half again.) Lift the pie dough, place it in the pie pan, and carefully unfold the dough.
- Then press the crust snuggly along the bottom and sides of the pan. Do not stretch the dough, but push it down and against the sides and crevices. (This will help it fit inside the pan and not shrink from being stretched.)
Shaping a Single Crust
Next, you will prepare the pie crust for the type of pie you will be making. If using a single crust you will:
- Cut off any excess crust leaving about a 1/2-inch overhang.
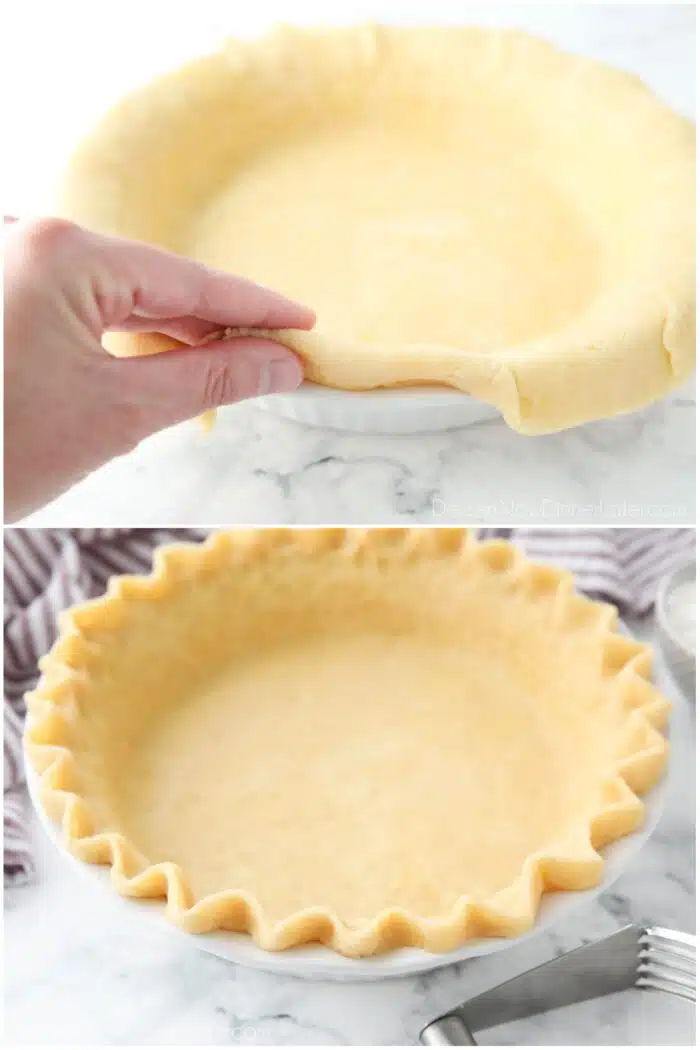
- Fold the overhanging dough underneath and pinch it together to form a rim.
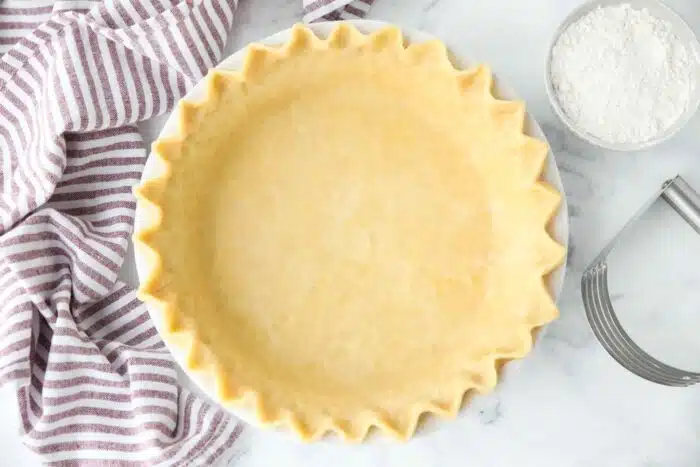
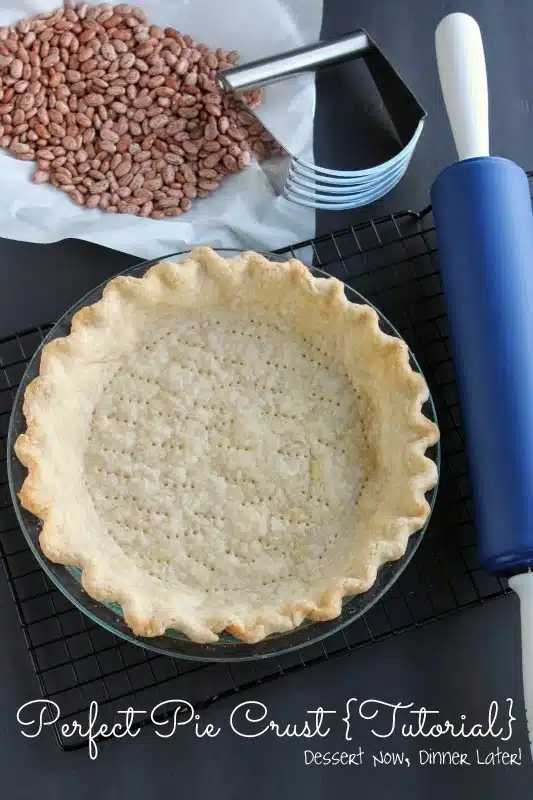
- Use the pointer finger and thumb of both hands to crimp/flute the edges into a wavy ruffle.
Blind Baking a Pie Crust
You will need to blind bake a single crust for cream pies like:
- Chocolate Cream Pie
- Coconut Cream Pie
- Raspberry Cream Pie
- Blueberry Cream Cheese Pie
- Sugar Cream Pie
- or for a Fresh Strawberry Pie
You can also par-bake a single crust for a pumpkin pie or quiche.
Shaping a Double Crust
For a traditional double crust pie, with a top and bottom crust, you will use both crusts from this recipe. You can even use this recipe for a 9×13-inch pan if you divide the dough with a bigger portion and smaller portion.
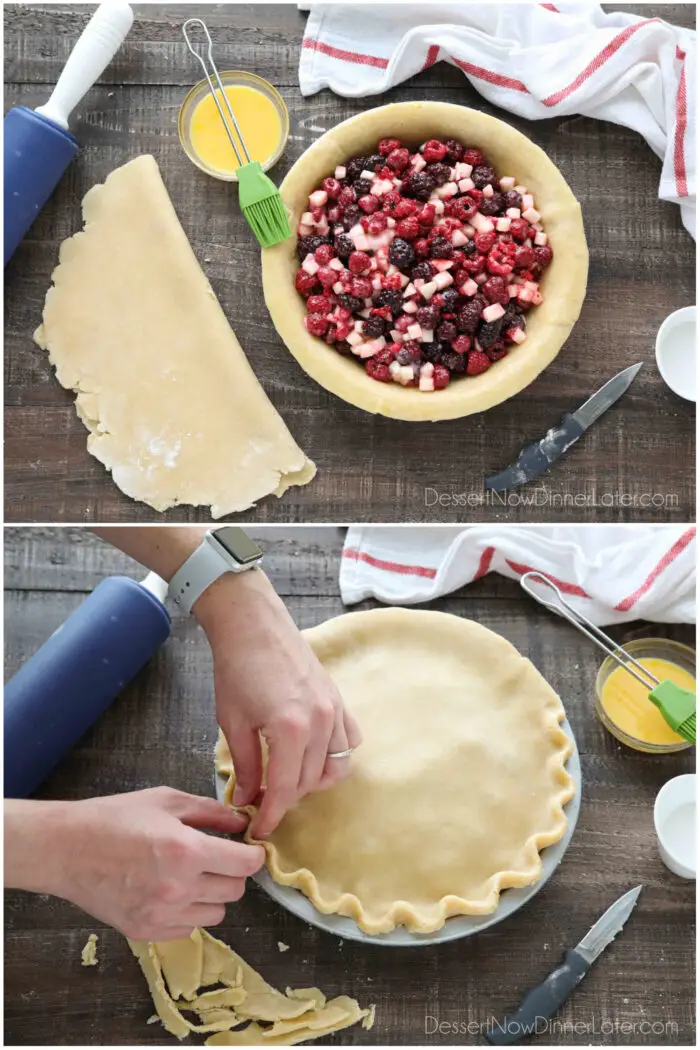
- Cut the excess dough off the bottom crust at the edge of the pie plate, then add the pie filling. Brush the edges of the pie crust with a little egg wash (an egg mixed with 1 Tablespoon of water).
- Add the top crust and cut off any excess, then press the two crusts together with your fingers and crimp the edges.
- Brush the top with egg wash and sprinkle with granulated sugar or cinnamon-sugar to sweeten and flavor the crust, if desired. (The egg wash alone will also help the crust brown nicely.)
- Cut slits for ventilation and bake at 350 degrees Fahrenheit.
- Double crust pies will take about 1 hour or more until the filling bubbles and the crust is brown. You should notice through the slits in the crust if the filling has bubbled. If your crust is getting too brown, cover it with foil until the filling bubbles.
NOTE: In my experience it usually takes 1 hour plus 10 to 15 minutes for the filling to bubble and the crust to be completely baked.
Lattice Crusts and More
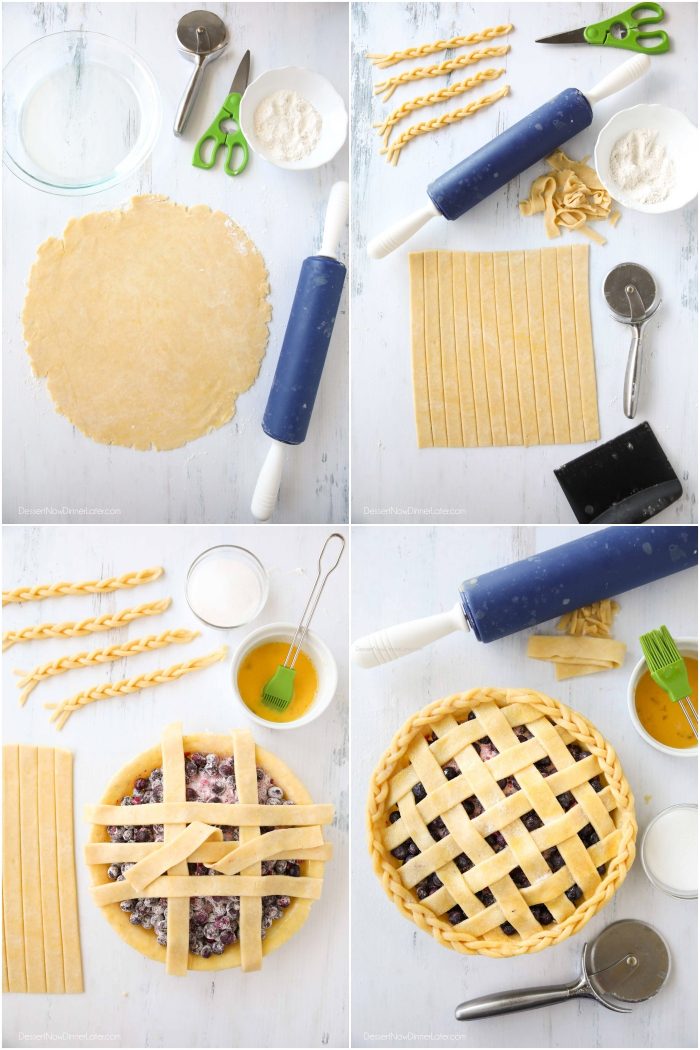
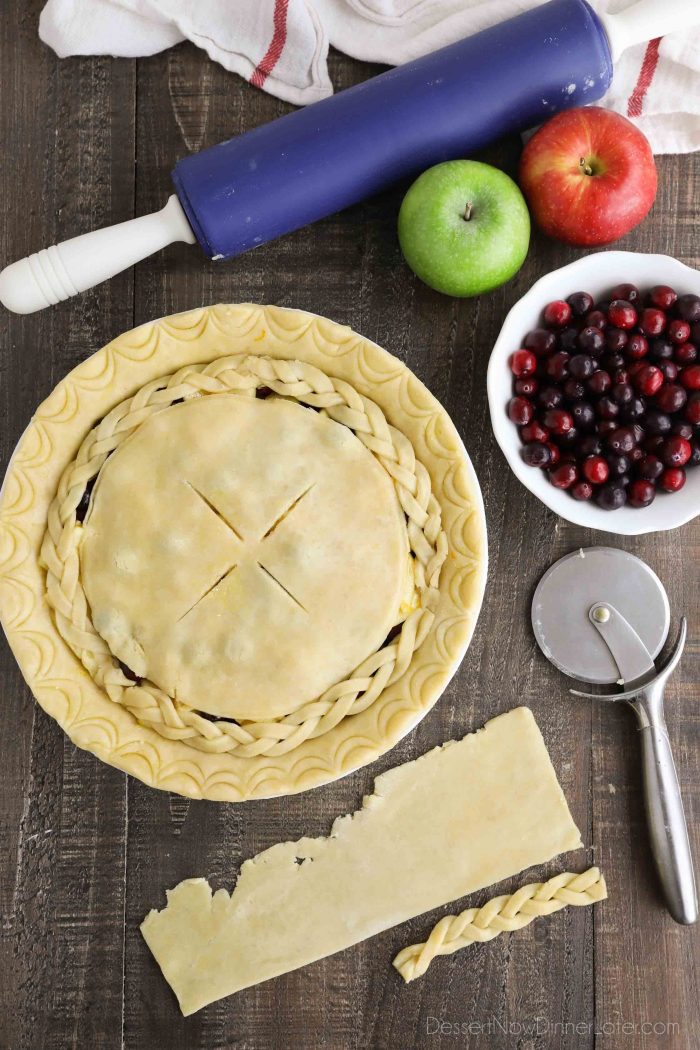
- Once you have made this easy pie crust recipe you can play with it to create the most beautiful crusts. Follow my tutorial for how to make a lattice pie crust if you want to weave the crust over the top like for my Peach Pie.
- I love to add braids, cut-out shapes, use a spoon to create scallops, and more! (See examples below.) Pie crust is like play dough for adults.
If You Make This Recipe, Please Rate and Review it in the Comments Below. THANKS!
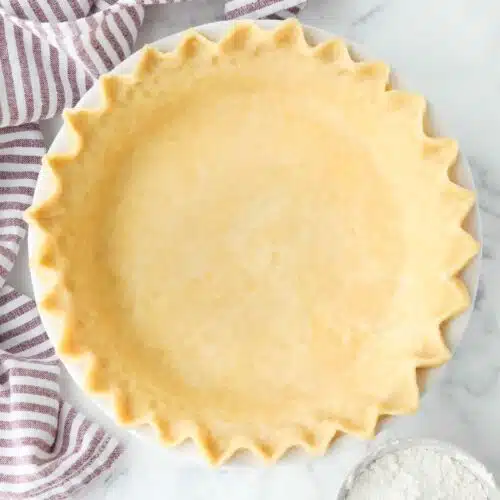
Easy Pie Crust
Ingredients
- 3 cups (360 g) all-purpose flour, (stir, spoon & level)
- 1 tsp salt
- 1 cup (192 g) shortening, (I prefer Crisco butter flavored)
- 1 large egg
- 1 Tbsp distilled white vinegar
- 5 Tbsp + ice cold water
Instructions
- In a large bowl, stir together the flour and salt.
- Cut the shortening into the flour mixture with a pastry blender or fork until it resembles pea-size pieces with some course crumbs. (NOTE: Don’t cut the shortening into fine crumbs, or the crust will be crumbly instead of flaky. Those little balls of shortening are creating pockets of air in your pie crust, which become the flaky layers you want to achieve.) You can also break up the shortening into the flour mixture by rubbing it together with your fingers.
- Add the egg, vinegar, and 5 Tablespoons of ice cold water. Stir together with a spatula. Then empty the mixture onto the countertop and press/squeeze the dough together.
- Add extra ice cold water 1 Tablespoon at a time (usually only 1-2 Tablespoons more) pressing and squeezing until the dough just comes together. (NOTE: Do not add too much water and do not over-mix.)
- Once the dough comes together, divide the dough in half. (NOTE: If using a deep pie dish, make one half slightly bigger than the other.)
- Flatten each half into a round disk. Wrap each half tightly in plastic wrap and refrigerate for 30 minutes before using. See tips in post for How to Roll Pie Crust.
Notes
- Refrigerate: Up to 3 days. After that it must be baked or discarded. TIP: If the pie crust has been chilled for longer than 1 hour, allow the pie crust sit out at room temperature just long enough to take the chill off before rolling it out. (About 10 minutes.) This will help to prevent cracks.
- To Freeze: Shape pie dough into a flat disk and double-wrap it in plastic wrap, then freeze it. You can place the wrapped pie crust(s) in a freezer bag for added protection. Be sure to label the pie dough with the date. Freeze up to 3 months.
- If you work quickly, it is easiest to roll the crust right away without chilling it. (Make sure to keep the other half in the fridge while you roll the first crust out.) If you decide to roll the crust right away, you will want to chill the entire pie in the freezer for 10-15 minutes before baking it.
- If you are baking a pie with a double crust, you need to cut slits into the top layer and bake the pie at 350˚F for a minimum of 1 hour or until the filling bubbles and the crust is brown. You should notice through the slits in the crust if the filling has bubbled. If your crust is getting too brown, cover with foil until the filling bubbles. (In my experience it usually takes 1 hour plus 10 to 15 minutes for the filling to bubble and the crust to be completely baked.)
Did you make this?
Don’t forget to leave a rating below and make sure to follow on Pinterest and Instagram for more!
Recipe adjusted from The Pioneer Woman
*Originally published as Perfect Pie Crust on 11/11/2013. Post updated September 2024.







Dear amber,
I love ur blog
So helpfull
The pictures are tempting
Do u mind to have behind the scenes pictures for photo tutorial
Hi Debi!
I’m not sure I quite understand your question, but I do happen to have a picture on instagram of me doing this tutorial: https://www.instagram.com/p/uyG5ynGPQP/?taken-by=amber_dessertnowdinnerlater
Thanks for your kindness!
I’m going to have to try this! I love the idea of baking it with the beans on top! I hate when you get huge air pockets in the crust. 🙂
Yes! It helps weigh down the crust so there are no bubbles. Fun little trick, right?!
Is your shortening cold or just room temp?
I use room temperature, but it’s always better cold, if you have time to do that.
Love this! Wish I had found it before Thanksgiving. My crust wasn’t nearly as tender and flaky as I would have hoped!
Well, shucks! You can try again for Christmas though! 😉
I love the step by step photos, very reassuring. I don’t do pies very much (apart from mince pies and jam tarts which are little and therfore non scary) because I’m always afraid of a soggy bottom. You have given me confidence, I will be pinning for future reference!
If you get a soggy bottom, it’s because your crust was not chilled properly. Don’t let it get too warm, but this crust is harder to screw up b/c it’s shortening instead of an all butter crust. 🙂
Thank you SO much for this! I have always been scared of pie crusts but this year I am totally going to go for it! Great tutorial!
You’re welcome! Thanks for stopping by! 🙂
Confession: I’ve never made pie crust! My sister put my in charge of desserts for Thanksgiving, so I’m going to give this a shot! Thanks for the great tutorial Amber!
NEVER?! Wow, well, you can do it! Let me know if you have any questions, but hopefully my tutorial is plain & simple & reassuring 🙂
Awesome tutorial! Pie crust always intimidates me!
I get that a lot of people have troubles with it, so hopefully this makes many people less fearful & more prepared to do a good job 🙂
Thanks for the tutorial and tips – I’m thinking of making a pie this week! This came at just the right time 🙂
Yvonne @ TriedandTasty.com
Yvonne, you can totally do it girl! Call me if you have any questions 🙂
This step-by-step tutorial is fabulous! Thank you so much for sharing – and let the pie making begin!
Thanks Kaylynnn!