Rainbow Cake Roll
This stunning rainbow cake roll filled with sweet vanilla buttercream starts with a cake mix! Step-by-step photos show you exactly how to make this striped Swiss roll. Great for birthdays, celebrations, or St. Patrick’s Day.
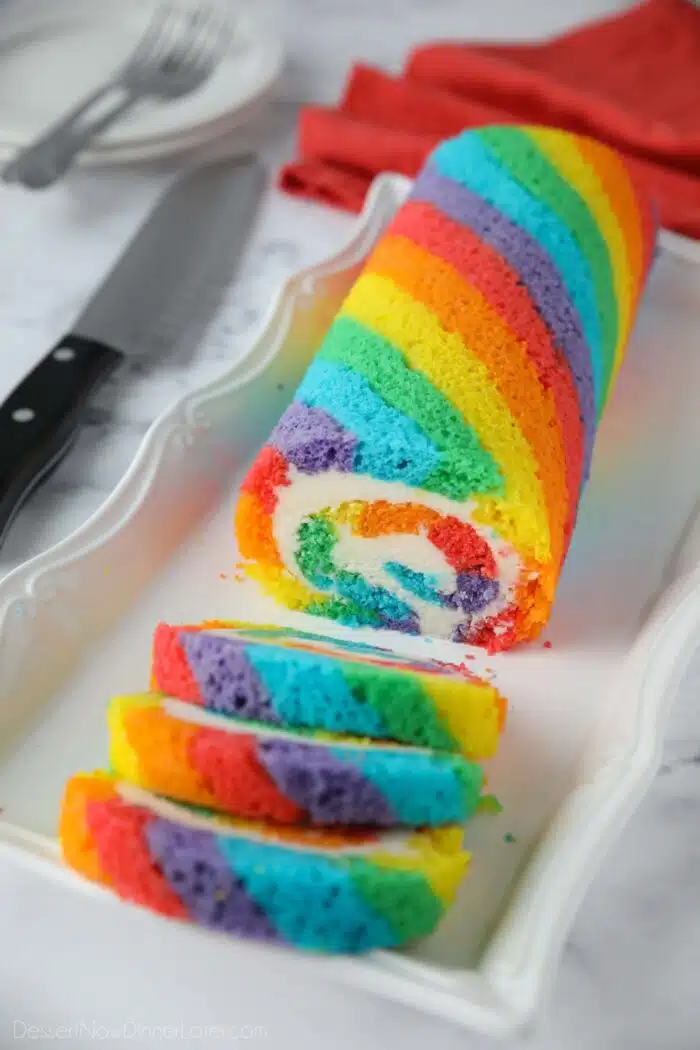
Rainbow Desserts
Rainbow desserts are so happy and the vibrant colors make me giddy like a kid. Every year around St. Patrick’s Day I whip up a rainbow dessert.
I’ve made rainbow cupcakes — two ways. One with colored cake mix. The other — homemade funfetti cupcakes with rainbow icing. Both fun and colorful, with totally different looks.
Save This recipe
Enter your email below to get a link to this recipe emailed straight to you to save later! Plus be signed up for all new recipes.
I’ve even made rainbow bread, which isn’t really dessert, but makes fun French toast. This year I wanted to try something new and make a rainbow cake roll.
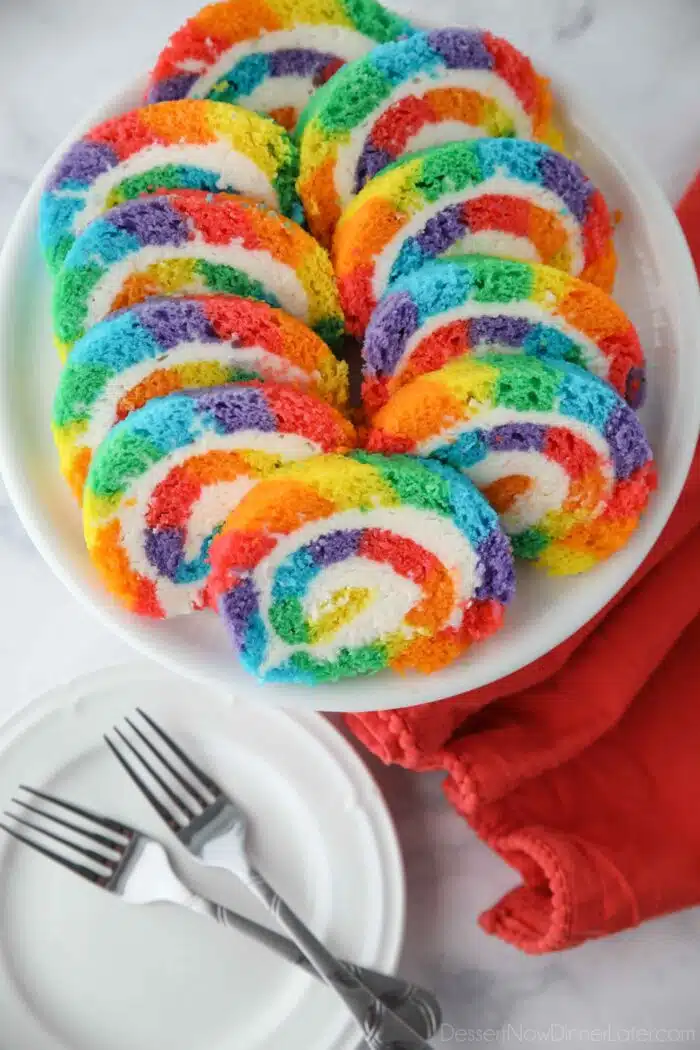
Striped Swiss Roll
I’ve made many a cake roll before, also known as a Swiss roll. Namely a pumpkin cake roll, carrot cake roll, and red velvet cake roll, but never a striped cake roll, until now.
My friend Mandy from Baking with Blondie has made many multi-colored cake rolls with her doctored cake mix recipe, so I decided to give it a try. I loved the idea of a shortcut by using cake mix since there are six colors that needed to be mixed and piped.
Through my experience testing this rainbow cake roll, I’ve concluded that it takes more time and skill, due to mixing and piping the different colors. So it’s not really a beginner’s recipe, but a fun recipe to make if you want to try something more challenging.
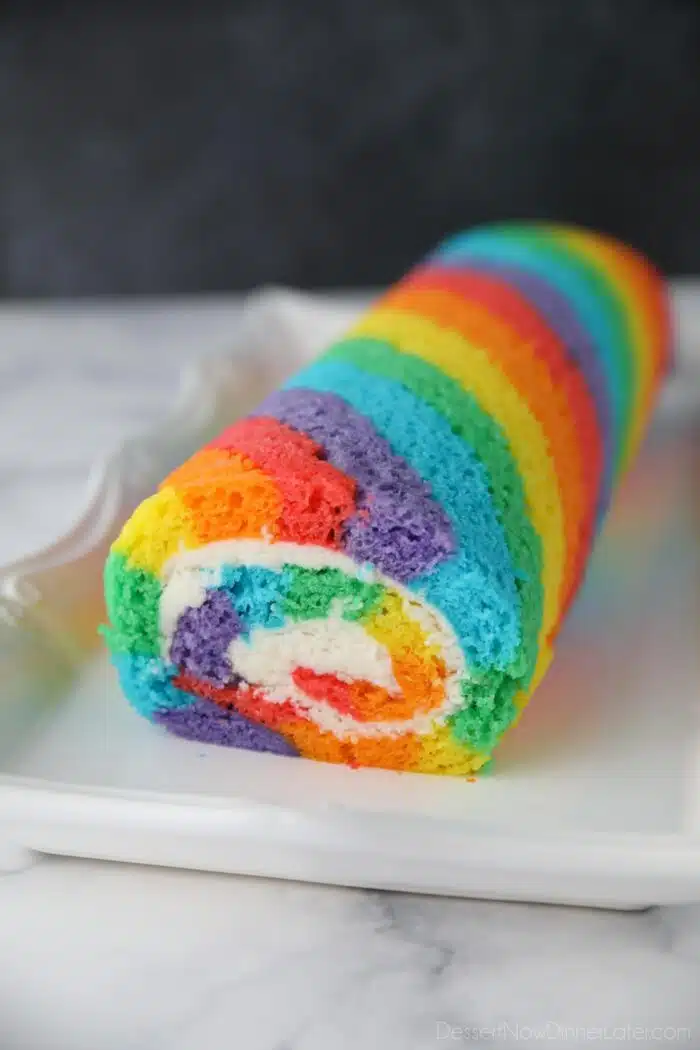
How to Make a Rainbow Cake Roll
Detailed photos and instructions are below, but here is the condensed outline of how to make a rainbow cake roll:
- Make the cake batter.
- Divide the batter, color it, and then fill piping bags with the different colors.
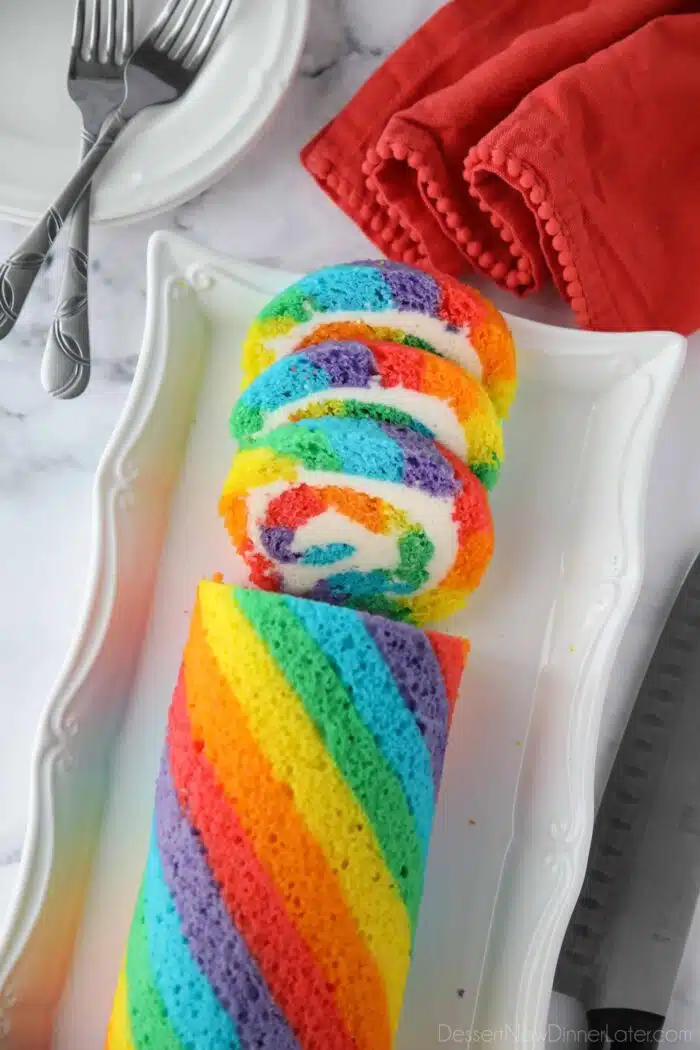
- Use the bags to pipe stripes in the order of a rainbow onto a parchment-lined baking sheet.
- Bake the cake, then roll it up inside the parchment paper.
- Unroll the cake after it has cooled and fill it with vanilla frosting.
- Roll the cake back up with the filling inside.
- Wrap and chill the cake.
- Slice and serve the cake.
NOTE: A cake roll made from mix cake is slightly more delicate and fluffy than my other cake roll recipes, but I will share my best tips for success.
Step 1: Make the Cake Batter
Preheat the oven to 325 degrees Fahrenheit. Line a half sheet pan (13×18-inches) with parchment paper, leaving a couple inches of overhang to easily lift the cake out of the pan. Set aside.
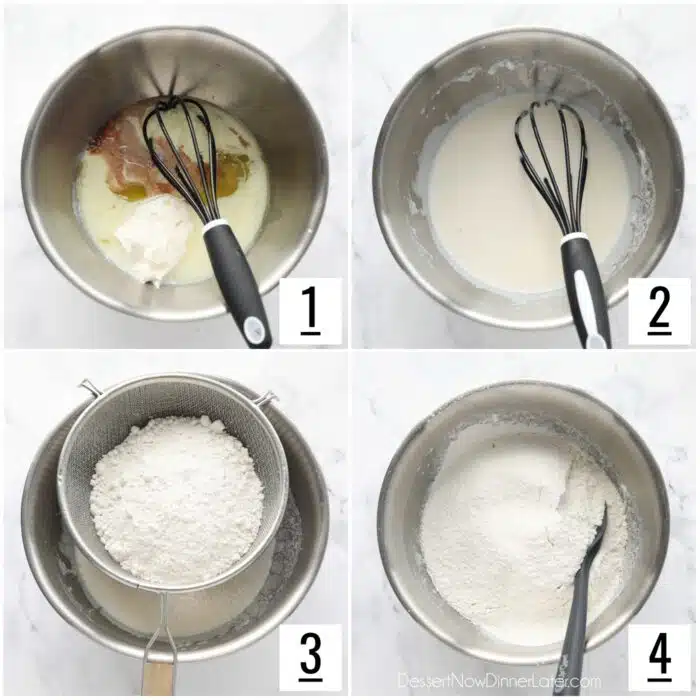
- Place the sour cream, buttermilk, vanilla, egg whites, and oil in a large bowl.
- Whisk together until combined well.
- Sift the white cake mix into the bowl of wet ingredients.
- Stir together until just combined. (Do not over-mix.)
Step 2: Divide, Mix, and Bag the Colors
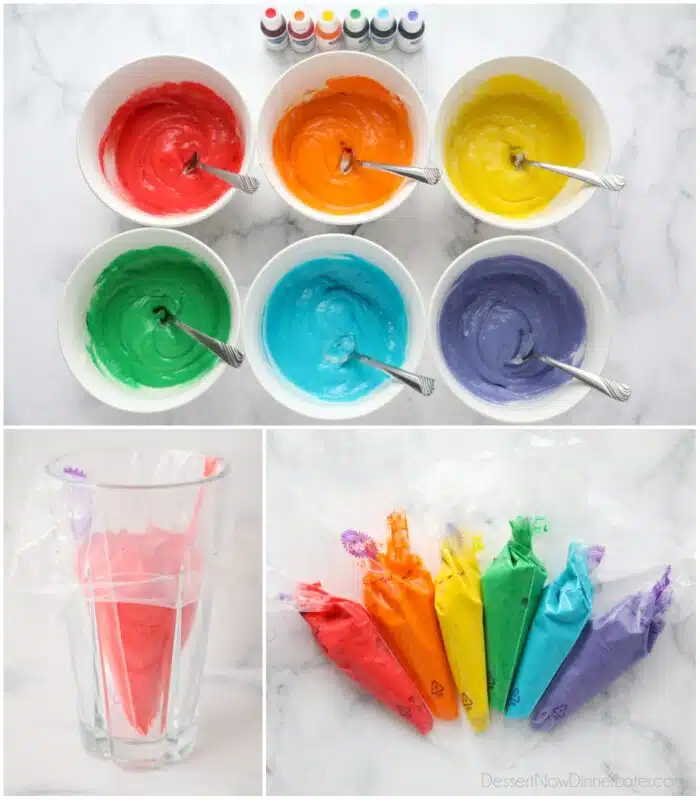
- Divide the cake batter into six small bowls; about 2/3 cup of batter in each. Add food coloring (I used AmeriColor gels) and mix colors separately. (Red, orange, yellow, green, blue, and purple.)
- Fill piping bags with individual colors. It’s easiest to do this by using a glass cup to cuff the top of the bag over the rim. Then fill it with cake batter, remove the bag, and twist the top. NOTE: Do not cut the ends until ready to pipe.
Step 3: Pipe Stripes of the Cake Batter in Rainbow Order
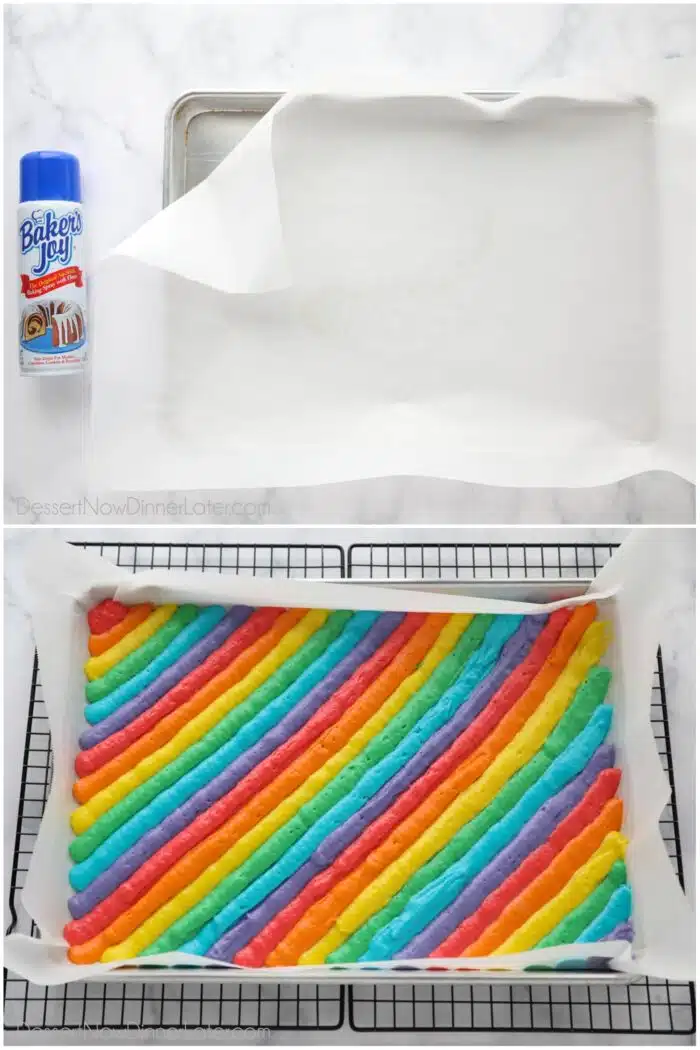
- Spray the parchment-lined baking sheet with Baker’s Joy — a nonstick baking spray with flour in it. (This helps release the cake in addition to the parchment paper.)
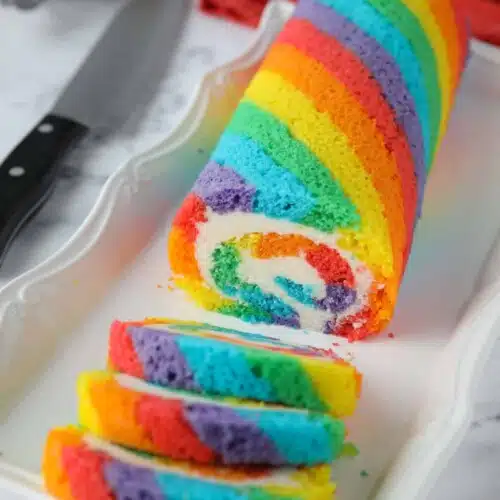
- Cut the tips off the bags and pipe the colors diagonally across the pan in the order of a rainbow: red, orange, yellow, green, blue, and purple. TIP: Pipe thin layers to begin with so you don’t run out of cake batter. Then go back over any areas that may need extra.
- Tap the baking sheet on the counter to remove any air bubbles and to help the different colored stripes settle into one-another.
Step 4: Bake and Roll the Rainbow Cake
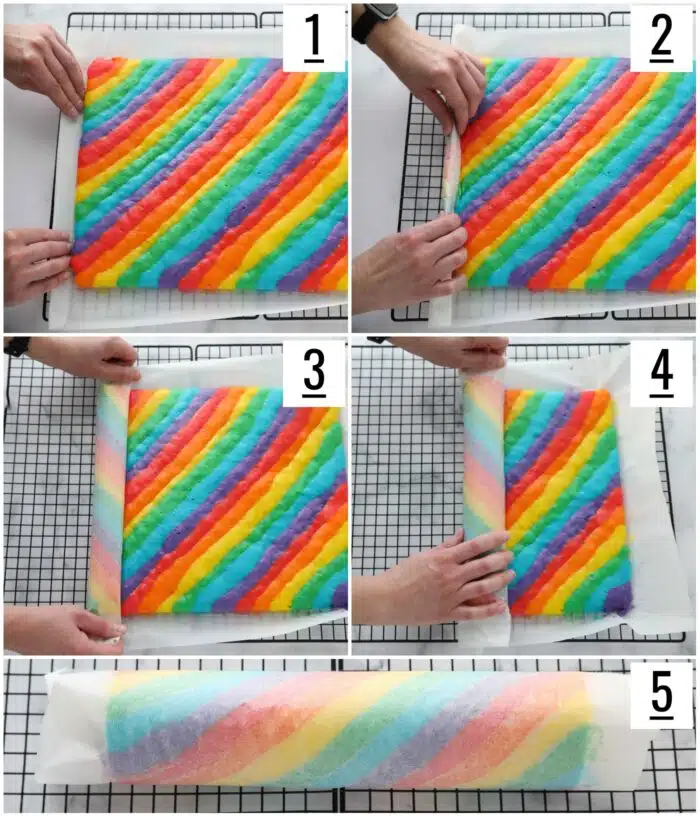
- Bake the rainbow cake roll at 325˚F for 17 minutes or until baked through.
- Immediately lift the cake out of the pan with the parchment paper and set it on a wire rack (or two, to make sure the cake doesn’t dangle off the edges and crack).
- Allow the cake to let off steam for 4 minutes. (Set a timer! Timing is important.) Then roll the cake up while it’s still warm starting from one of the shorter (13-inch) sides. TIP: I like to fold any excess paper to make it about 1-inch thick, then fold it on top of the cake, and then use the edges of the paper to continue rolling it up tightly without squishing the cake.
- Let the cake cool completely at room temperature; about 40 minutes. Meanwhile make the vanilla buttercream frosting.
Step 5: Unroll and Fill the Striped Cake Roll with Frosting
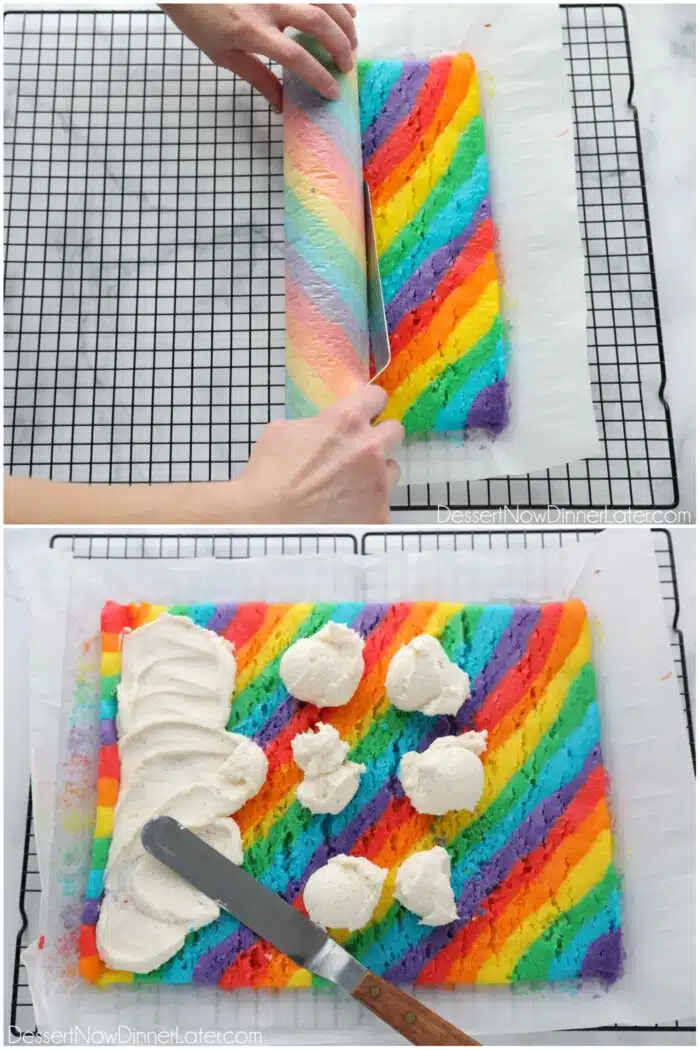
- Slowly and carefully unroll the cake. You may need to use a spatula to gently scrape off any cake that sticks to the paper due to the condensation.
- Dollop the frosting over the cake. Use an offset spatula to smooth the icing over the cake leaving 1/2-inch bare on the end you will roll towards. NOTE: Icing will seem thin. TIP: Keep the tip of the spatula in the frosting the whole time as to not lift crumbs into the frosting.
Step 6: Roll the Rainbow Cake Roll with Filling Inside
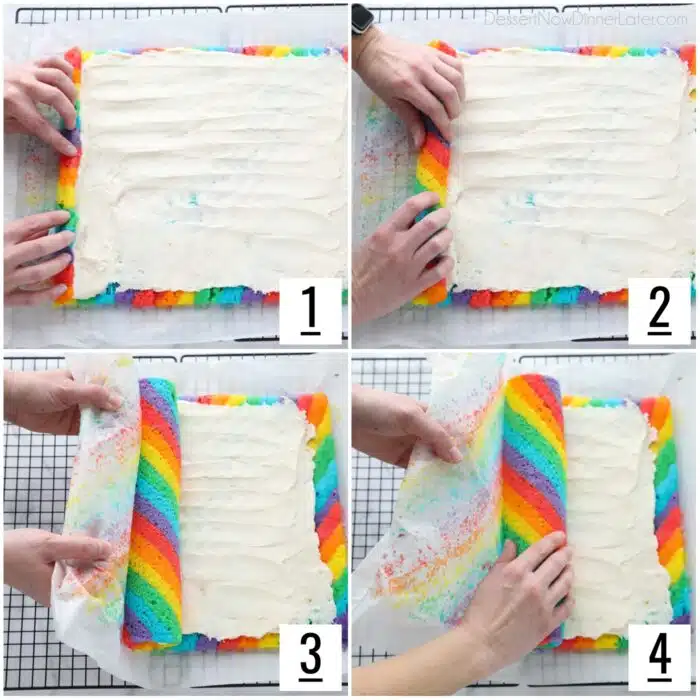
- Re-roll the cake as tightly as you can. Pulling the cake away from the parchment paper as needed. TIP: Start rolling the cake with your fingers, then lift the parchment paper to help roll the cake.
Step 7: Wrap and Chill
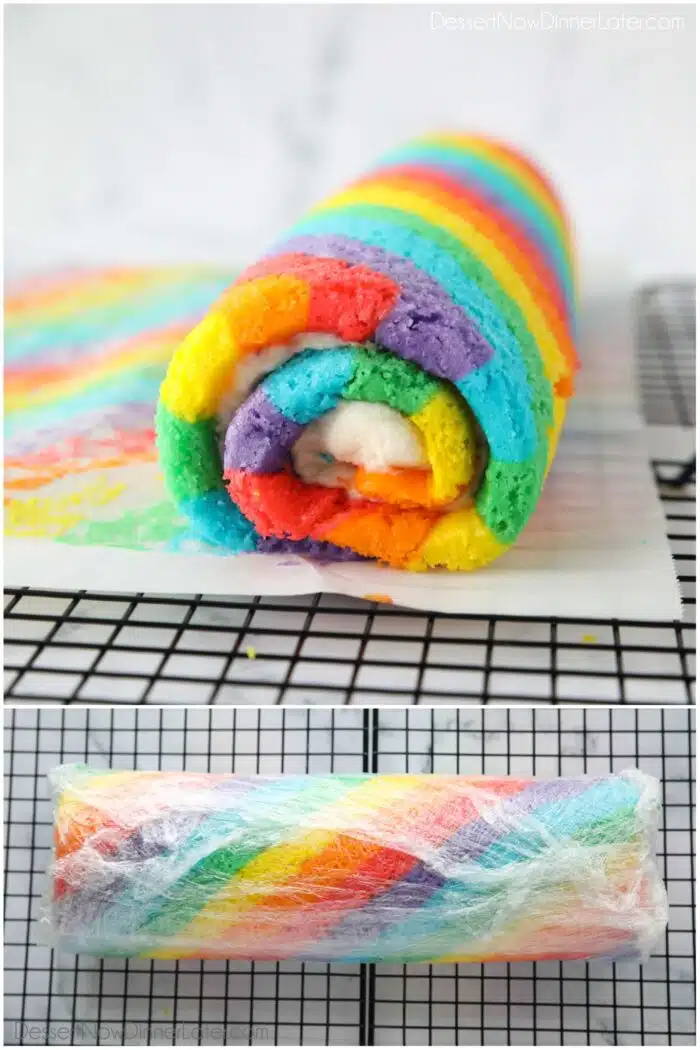
- Wrap the cake roll with plastic wrap and freeze it for 1 hour or until firm. Alternately freeze the cake overnight. TIP: Leave the cake on the parchment paper and cut off the excess. Then use the edges of the remaining paper to lift the cake onto the plastic wrap to be wrapped completely. This will help prevent any extra cracking from the delicate cake.
Step 8: Slicing and Serving the Rainbow Swiss Roll
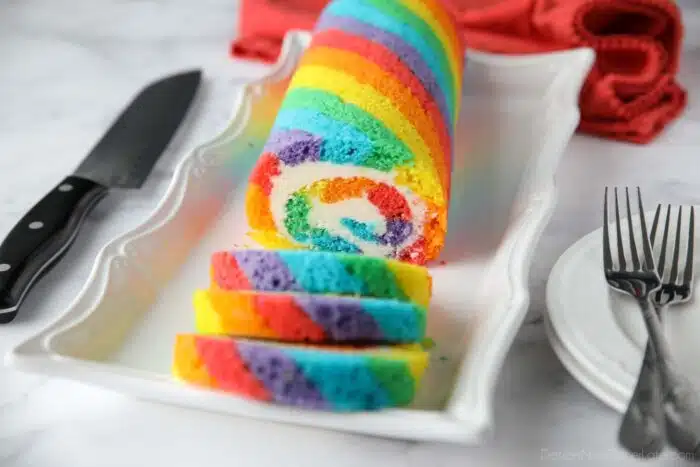
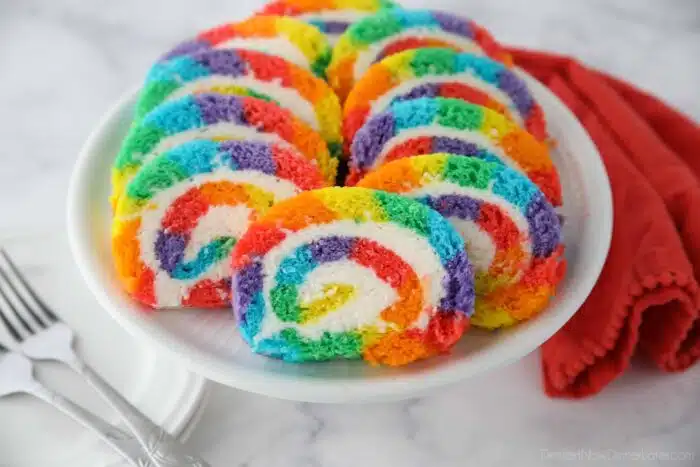
- Unwrap the chilled cake. Use a hot knife to cut the rainbow cake roll into 3/4-inch slices; about 16 pieces. TIP: Rinse and dry the knife between cuts for clean slices.
- NOTE: Cake slices will thaw in about 15 minutes at room temperature. Enjoy!
Important Tips
- Make sure to roll the cake while still warm. You want let off the majority of the steam before you roll up the cake, but if you wait too long you risk the cake cracking significantly. Set a timer for 4 minutes before rolling up the cake. Timing is everything in minimizing cracks.
- Parchment Paper vs Towel. Parchment paper is nice for easy cleanup, but if this is your first cake roll, I would flip the cake onto a powdered sugar dusted tea towel and remove the parchment paper before rolling the cake up. The cake mix made this cake a little more difficult to unroll from the parchment paper than my homemade cake rolls. The steam will also be able to escape easier through the fibers of the towel.
If You Make This Recipe, Please Rate and Review it in the Comments Below. THANKS!
Rainbow Cake Roll
Ingredients
Cake Batter:
- ⅔ cup (160 g) sour cream, room temperature
- ¾ cup (177 ml) buttermilk, room temperature
- 1 Tbsp pure vanilla extract
- 4 egg whites, room temperature
- ⅓ cup (80 ml) oil, canola/vegetable
- 1 (15.25)oz (432 g) box white cake mix, I use Duncan Hines
- food coloring gel, red, orange, yellow, green, blue, and purple
Vanilla Buttercream Frosting:
- 1 cup (226 g) unsalted butter, (2 sticks) room temperature
- ¼ tsp salt
- 4 cups (480 g) powdered sugar
- 2 tsp pure vanilla extract
- 4 Tbsp heavy cream, or milk
Equipment
Instructions
- Preheat the oven to 325℉. Line a half sheet pan (13×18-inches) with parchment paper, leaving a couple inches of overhang to easily lift the cake out of the pan. Optional: Spray the parchment-lined baking sheet with Baker’s Joy — a nonstick baking spray with flour in it. (This helps release the cake in addition to the parchment paper.) Set pan aside.
- Make the Cake Batter: Place the sour cream, buttermilk, vanilla, egg whites, and oil in a large bowl. Whisk together until combined well. Sift the white cake mix into the bowl of wet ingredients. Stir together until just combined. (Do not over-mix.)
- Divide and Color Batter: Divide the cake batter into six small bowls; about 2/3 cup of batter in each. Add food coloring (I use AmeriColor gels) and mix colors separately. (Red, orange, yellow, green, blue, and purple.) Fill piping bags with individual colors. It’s easiest to do this by using a glass cup to cuff the top of the bag over the rim. Then fill it with cake batter, remove the bag, and twist the top. NOTE: Do not cut the ends until ready to pipe.
- Pipe Stripes: Cut the tips off the bags and pipe the colors diagonally across the prepared pan in the order of a rainbow: red, orange, yellow, green, blue, and purple. TIP: Pipe thin layers to begin with so you don’t run out of cake batter. Then go back over any areas that may need extra.
- Bake: Tap the baking sheet on the counter to remove any air bubbles and to help the different colored stripes settle into one-another. Bake the rainbow cake roll at 325℉ for 17 minutes or until baked through.
- Rolling & Cooling: Immediately lift the cake out of the pan with the parchment paper and set it on a wire rack (or two, to make sure the cake doesn’t dangle off the edges and crack). Allow the cake to let off steam for 4 minutes. (Set a timer! Timing is important.) Then roll the cake up while it’s still warm starting from one of the shorter (13-inch) sides. TIP: I like to fold any excess paper to make it about 1-inch thick, then fold it on top of the cake, and then use the edges of the paper to continue rolling it up tightly without squishing the cake. Let the cake cool completely at room temperature; about 40 minutes.
- Make the Vanilla Buttercream Frosting: Using an electric mixer and the paddle attachment beat the butter with the salt until creamy. Add the powdered sugar, 1 cup at a time, mixing completely before adding more. Repeat until all powdered sugar is added. Mix in the vanilla. Add the heavy cream or milk 1 Tablespoon at a time while mixing, until the desired consistency is reached.
- Slowly and carefully unroll the cake. You may need to use a spatula to gently scrape off any cake that sticks to the paper due to the condensation.
- Filling: Dollop the frosting over the cake. Use an offset spatula to smooth the icing over the cake leaving 1/2-inch bare on the end you will roll towards. NOTE: Icing will seem thin. TIP: Keep the tip of the spatula in the frosting the whole time as to not lift crumbs into the frosting.
- Re-roll the cake as tightly as you can. Pulling the cake away from the parchment paper as needed. TIP: Start rolling the cake with your fingers, then lift the parchment paper to help roll the cake. *See photos in post.
- Chilling: Wrap the cake roll with plastic wrap and freeze it for 1 hour or until firm. Alternately freeze the cake overnight. TIP: Leave the cake on the parchment paper and cut off the excess. Then use the edges of the remaining paper to lift the rolled cake onto the plastic wrap to be wrapped completely. This will help prevent any extra cracking from the delicate cake.
- Unwrap the chilled cake. Use a hot knife to cut the rainbow cake roll into 3/4-inch slices; about 16 pieces. TIP: Rinse and dry the knife between cuts for clean slices. NOTE: Cake slices will thaw in about 15 minutes at room temperature.
Notes
- Double wrap the cake if freezing for longer than 24 hours.
- Frosting makes about 3 cups.
- Store any leftover cake slices wrapped well in the refrigerator.
Nutrition
Did you make this?
Don’t forget to leave a rating below and make sure to follow on Pinterest and Instagram for more!





Read the recipe several times. Epic failure. Tried to turn on to towel and half the cake collapsed. The remainder cracked when unrolling. Cute idea, will never make again
Sorry to hear it didn’t turn out as expected, Linda! This cake can be a bit tricky because the cake mix turns out fluffier than a homemade batter, and it does tend to crack. You can see it cracked on the inside of the cake roll for me too. I may have to re-work this recipe with a homemade batter to replace the cake mix. Thanks for your feedback.
Hello, this cake looks amazing and can’t wait to give it a go.
quick question can you make the cake mix yourself? Rather than buy a white cake mix?
If so do you have a go to Recipe?
Thanks
I haven’t tested a vanilla cake roll yet, so I can’t confidently recommend anything right now. Sorry!
It looks like this cake will be the star attraction on my Easter table. I am excited to bake this
Awesome! I would do a test run just in case, as it is more advanced. You can always wrap it well and freeze it ahead of time too. Full disclosure: It took me 3 tries to get it perfect. I shared all my tips in the body of the post to help you succeed. Good luck!
Beautiful and you make it look easy.
Thanks! I have made many a cake roll, but it still took me some practice on this particular one.