Red Velvet Truffles
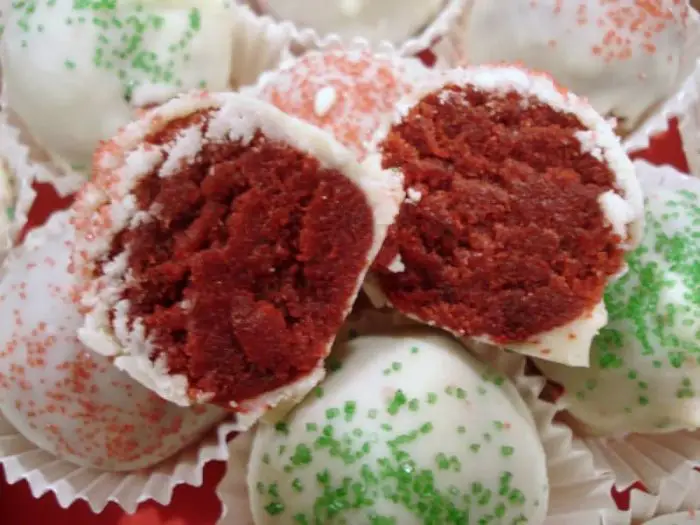
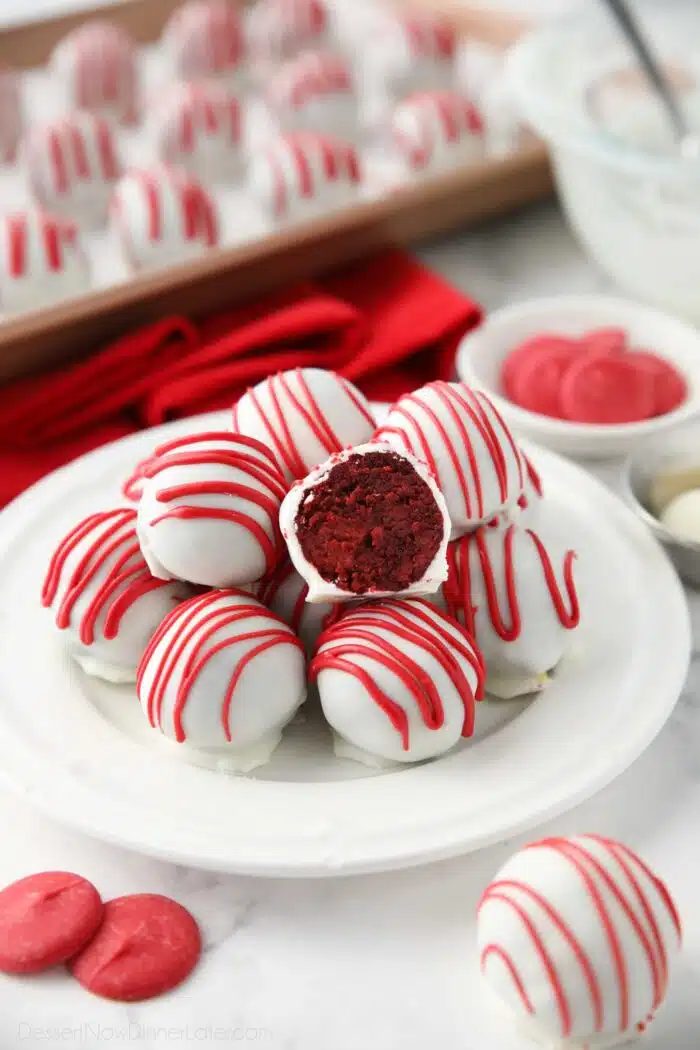
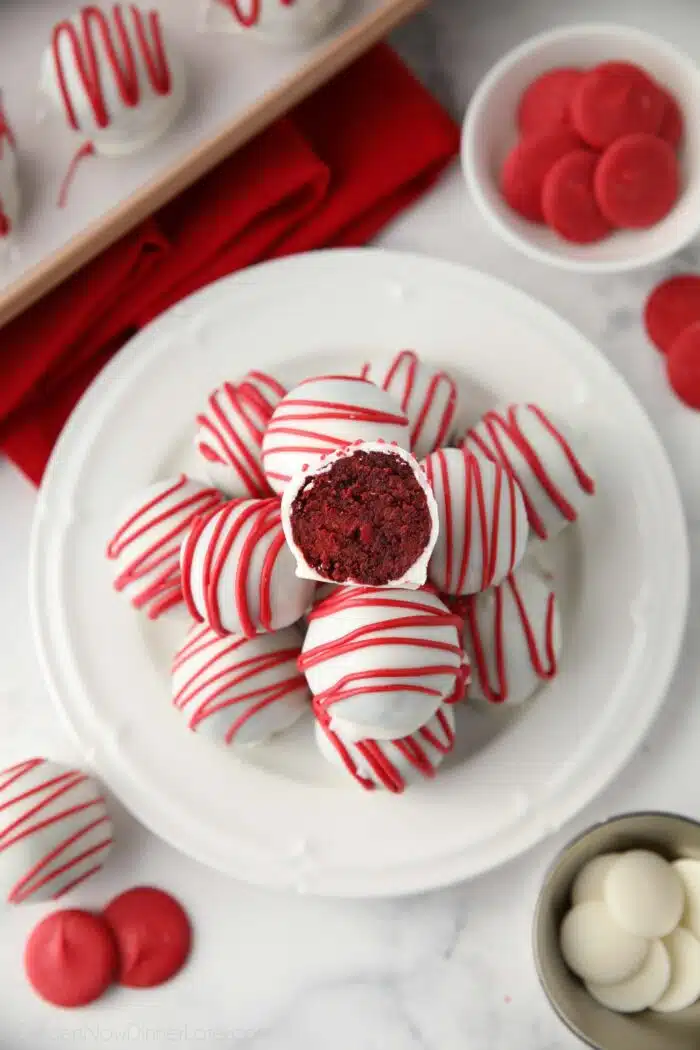
Whether you’re a seasoned baker looking for a quick fix or a kitchen novice eager to impress, these Red Velvet Truffles made with cake mix promise a delightful experience that is both accessible and delicious. Perfect for those seeking a hassle-free yet elegant dessert that transforms cake mix, cream cheese, and melting wafers into a stunning bite-sized treat.
Want more festive and beautiful Red Velvet Desserts? Try your hand at a Red Velvet Cake Roll or these swirled Red Velvet Cheesecake Brownies. Bake homemade Red Velvet Cupcakes or grab a cake mix and make Red Velvet Blossoms or this shareable Red Velvet Pizookie.
Why You’ll Love these Easy Cake Truffles
- Easy and Convenient: Using cake mix simplifies the baking process, as it already contains the necessary dry ingredients in the right proportions. This can save time and effort compared to starting from scratch.
- Consistent Flavor: Cake mix is formulated to provide a consistent flavor profile, ensuring that your red velvet truffles have that classic taste associated with red velvet desserts.
- Simplicity: Not only is the cake-mix a great shortcut — using melting wafers for both the white coating and red drizzle means you get a smooth finish and glossy shine, without having to temper any chocolate.
These red velvet truffles (aka red velvet cake pops without the stick) are great for Christmas parties and neighbor plates or as a romantic treat for your sweetheart on Valentine’s Day.
Save This recipe
Enter your email below to get a link to this recipe emailed straight to you to save later! Plus be signed up for all new recipes.
And with my step-by-step photo tutorial, you’ll have near-perfect looking truffles that will wow your family and friends!
Make the Red Velvet Cake Mix
Make the red velvet cake according to the directions on the box and bake it in a 9×13-inch pan.
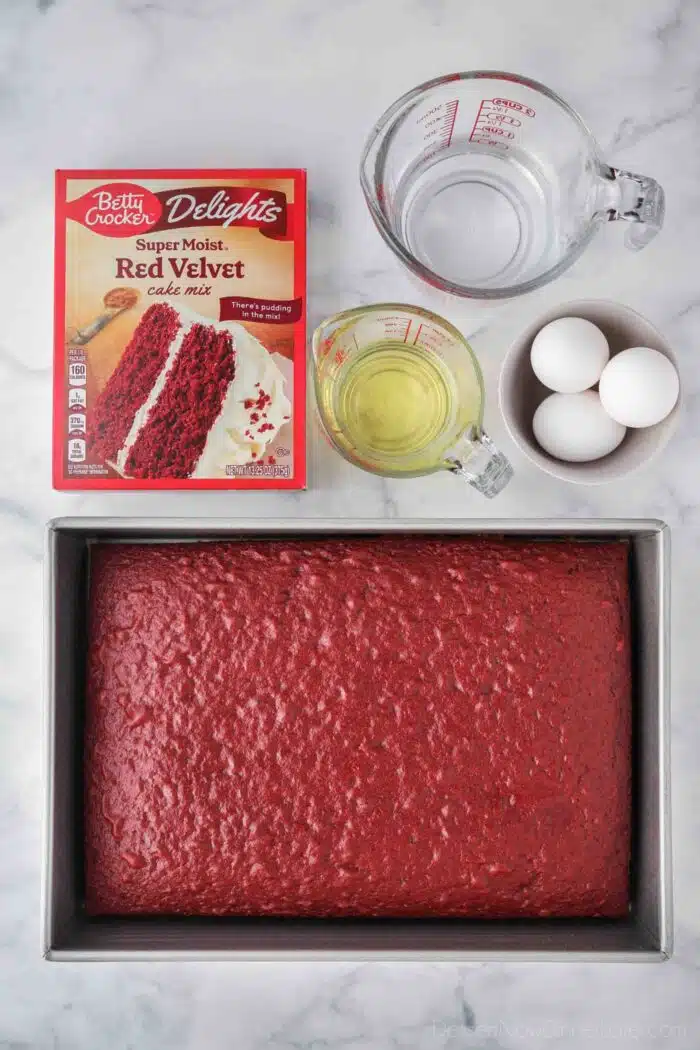
NOTE: Each package/brand may require a different amount of water, oil, and eggs, so use the amount of ingredients listed on the box.
Mix and Shape the Red Velvet Truffles
- Use your hands to break the cooled cake into fine crumbs.
- Add softened cream cheese and mix together with your hands or a spatula until the cream cheese is fully incorporated. It will start to clump together when it’s well-mixed.
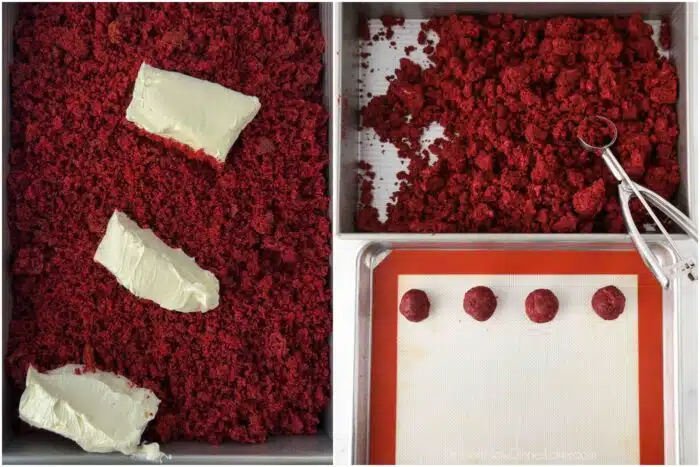
- Shape into 1.5-inch balls using a heaping Tablespoon or small cookie scoop (#50). Squeeze the cake mixture together and roll with your hands until smooth and round. Place on a parchment or silicone lined baking sheet. You should end up with around 48 red velvet truffles.
- Place in the fridge for 30 minutes or in the freezer for 15 minutes to chill. Do not chill longer than this or the coating may crack after setting.
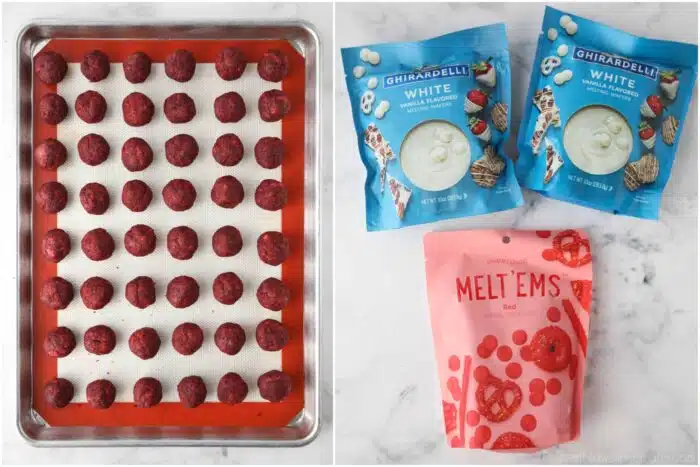
While the red velvet cake balls are chilling, melt the white vanilla wafers according to the directions on the package.
NOTE: I used Ghirardelli white vanilla flavored melting wafers and the microwave method to melt them. Only melt one bag at a time so the chocolate doesn’t solidify as you’re dipping.
Coating the Red Velvet Cake Truffles
Rather than drop the cake balls into the white vanilla coating and risk leaving behind a bunch of red crumbs, I prefer to coat mine using a fork and spoon.
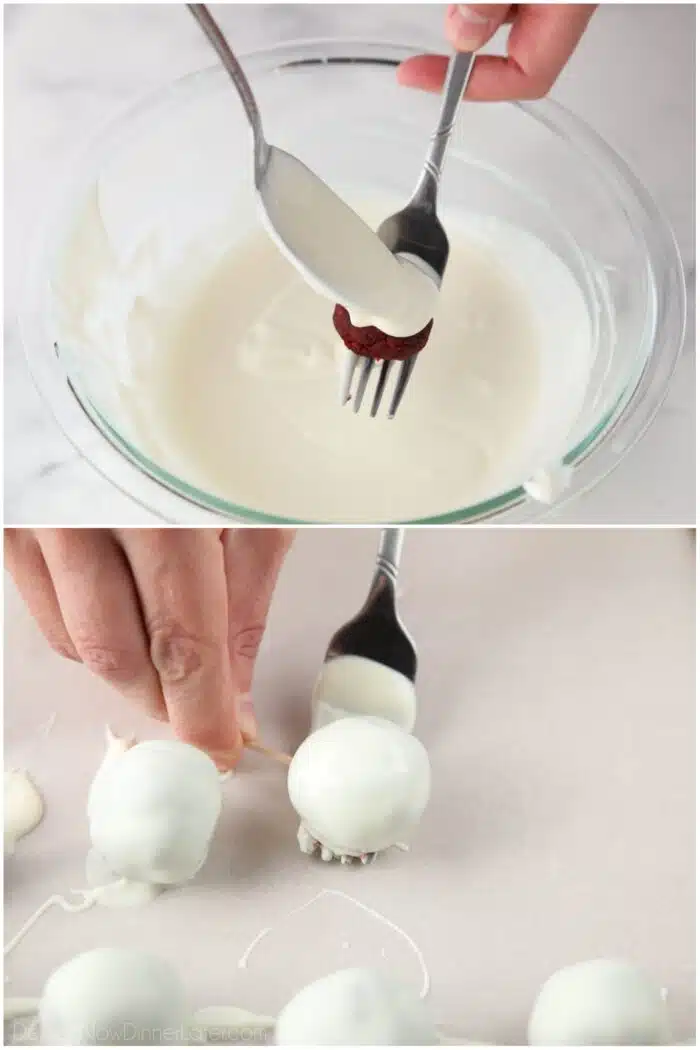
- Place a truffle at the tip of a large fork. Use a large spoon to pour some of the melted mixture over the top. Go over it twice to ensure full coverage. Gently tap/shake off any excess.
- Use a toothpick to slide the red velvet truffles off of the fork and back onto the parchment or silicone lined baking sheet. Allow vanilla coating to set.
Decorating the Red Velvet Cake Balls
If you prefer to top your red velvet cake balls with sprinkles, you will need to add them immediately after dipping in the vanilla coating before it sets.
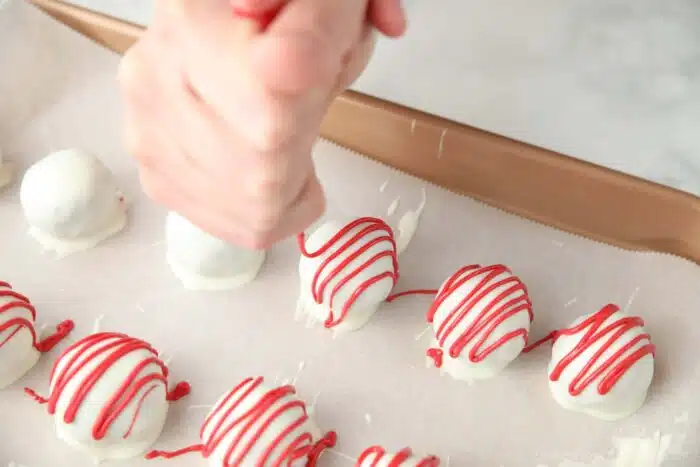
If you would like to do a red drizzle, wait until the vanilla coating sets. Then:
- Melt a small amount (1/3 to 1/2 cup) of red candy melts according to the directions on the package.
- Once melted, transfer into a zip-top sandwich bag and make a very small cut in the corner.
- Gently squeeze and drizzle back-and-forth over the truffles.
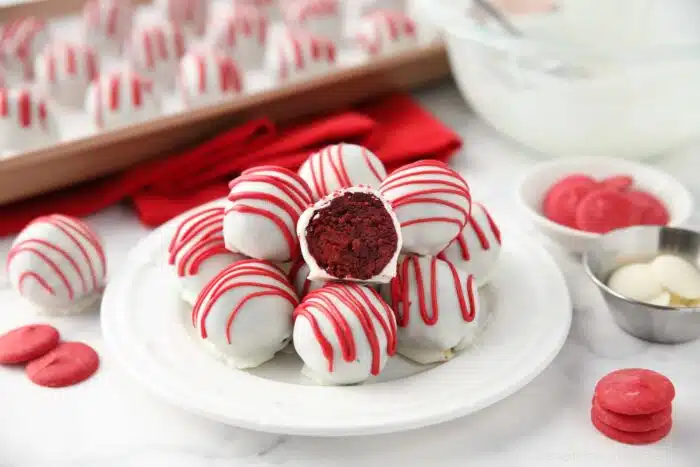
- Chill in fridge, until firm.
Storing and Freezing
STORE: Store truffles in an airtight container with parchment paper between layers for up to 2 weeks. (If you don’t eat them all before then.)
FREEZE: To freeze, first let the coating set. Then fill the bottom of a freezer-safe container with some of the truffles. Place parchment paper on top of the first layer, then stack more on top. Repeat as needed, using parchment paper between each layer. Freeze for up to 3 months. Thaw in the fridge overnight.
Tips for Success
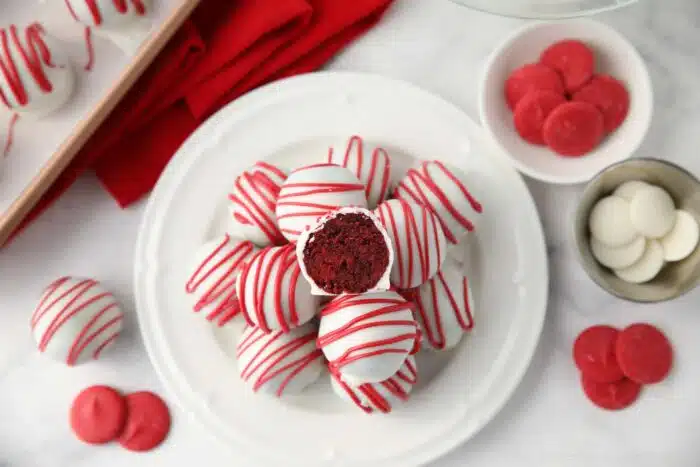
- Slightly underbake the cake. Remove the cake from oven when a toothpick inserted into the center comes out with a few moist crumbs still. The extra moisture helps the cake roll into balls more easily. Dry cake may need additional cream cheese.
- Use soft cream cheese. If the cream cheese is too cold, it won’t mix very well into the red velvet cake crumbs. It must be soft. Nuke it in the microwave until it leaves an indent when pressed with your finger.
- Use a stand mixer. While you can use your hands to break up the cake and incorporate the cream cheese, a stand mixer can do this more easily.
- Don’t freeze/chill the Red Velvet Truffles too long. Do not chill the shaped cake balls longer than the recommended time or the coating may crack after setting. You just want it stiff enough that the cake crumbs don’t fall off into the melted mixture.
More Bite-Sized Treats
- Easy Peanut Butter Balls
- Pretzel Hugs
- Oreo Balls
- Cookie Dough Pretzel Bites
- Peanut Butter Pretzel Bites
- Chocolate Truffles
- Rolo Pretzel Turtles
- Dark Chocolate Trail Mix Bites
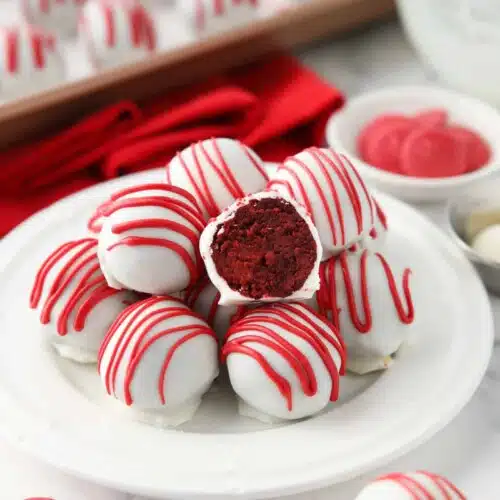
Red Velvet Truffles
Ingredients
- 13.25 oz (378 g) box red velvet cake mix, dry/unprepared
- 1 cup (237 ml) water, or amount listed on cake mix box
- ½ cup (118 ml) oil , (canola/vegetable) or amount listed on cake mix box
- 3 large eggs, or amount listed on cake mix box
- 8 oz (226 g) block-style cream cheese, softened
- 20 oz (568 g) white (vanilla flavored) melting wafers, I use 2 (10oz) bags Ghirardelli brand
- ⅓ cup (58 g) red candy melts
Equipment
Instructions
- Preheat the oven to 350℉. Grease a 9×13-inch cake pan. Then line a half sheet pan with parchment paper or a silicone baking mat. Set aside.
- In a large mixing bowl, combine the cake mix, water, oil, and eggs according to the package instructions. Pour the batter into the prepared cake pan, and bake as directed on package (ex. Bake at 350℉ for approximately 28-33 minutes) or until a toothpick inserted into the center comes out with just a few moist crumbs. Allow the cake to cool completely.
- Use your hands to break the cooled cake into fine crumbs. Add softened cream cheese and mix together with your hands or a spatula until the cream cheese is fully incorporated. It will start to clump together when it's well-mixed.
- Shape into 1.5-inch balls using a heaping Tablespoon or small cookie scoop (#50). Squeeze the cake mixture together and roll with your hands until smooth and round. Place on a parchment or silicone lined baking sheet. You should end up with around 48 red velvet truffles.
- Place in the fridge for 30 minutes or in the freezer for 15 minutes to chill. Do not chill longer than this or the coating may crack after setting.
- While the red velvet cake balls are chilling, melt the white vanilla wafers according to the directions on the package.
- Place a truffle at the tip of a large fork. Use a large spoon to pour some of the melted mixture over the top. Go over it twice to ensure full coverage. Gently tap/shake off any excess. Use a toothpick to slide the red velvet truffles off of the fork and back onto the parchment or silicone lined baking sheet. Allow vanilla coating to set.
- Melt a small amount (⅓ to ½ cup) of red candy melts according to the directions on the package. Once melted, transfer into a zip-top sandwich bag and make a very small cut in the corner. Gently squeeze and drizzle back-and-forth over the truffles. Chill in fridge, until firm.
Notes
- Store truffles in an airtight container with parchment paper between layers for up to 2 weeks.
- To freeze, first let the coating set. Then fill the bottom of a freezer-safe container with some of the truffles. Place parchment paper on top of the first layer, then stack more on top. Repeat as needed, using parchment paper between each layer. Freeze for up to 3 months. Thaw in the refrigerator overnight.
- Do not allow truffles to sit out at room temperature for more than 2 hours.
Nutrition
Did you make this?
Don’t forget to leave a rating below and make sure to follow on Pinterest and Instagram for more!
*Originally published 12/7/2011. Post updated November 2023.
