Whole Wheat Easter Bunny Rolls
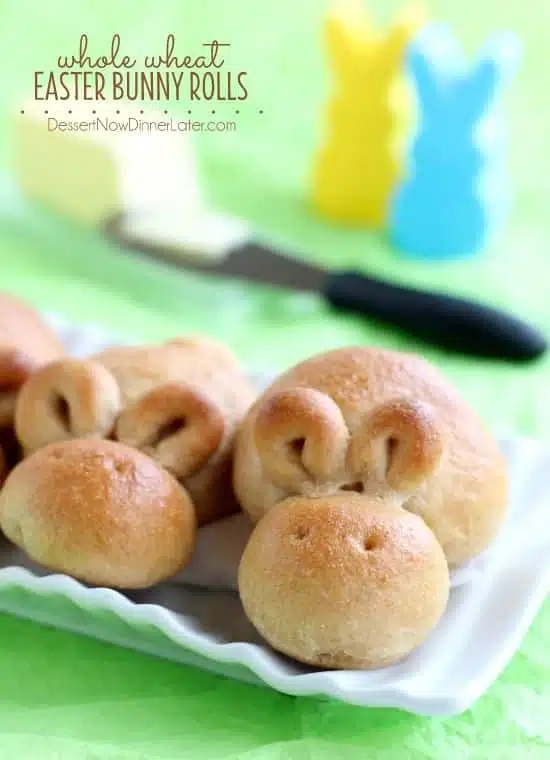
If you saw my other post about Fluffy Whole Wheat Bunny Rolls, then you know that this is the same fluffy whole wheat dough recipe, but shaped differently. I am sharing step-by-step photo instructions on how to make these as well. We’ll call these Easter Bunny Rolls the “advanced” version because they are slightly more time consuming, but they are complete with a little round tail and look more “bunny-like”.
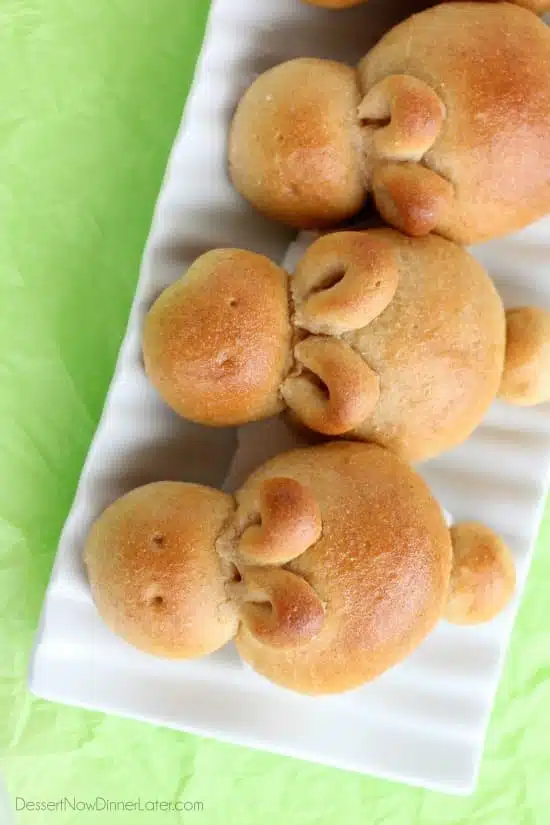
The biggest difference is that there is more shaping to do with these rolls. Here is the recipe, then we will get to the step-by-step instructions.
Whole Wheat Easter Bunny Rolls
Ingredients
- 2 Tbsp yeast
- ½ cup (118 ml) warm water
- ½ cup (113 g) butter, softened
- ¼ cup (84 g) honey
- 3 large eggs, room temperature
- 1 cup (237 ml) 2% milk, room temperature
- 1 Tbsp distilled white vinegar
- 1 ½ tsp salt
- 4 ½ to 5 ½ cups (684-760 g) whole wheat flour, (stir, spoon & level)
- 1 Tbsp oil, (canola, vegetable, or pure olive oil)
Instructions
- Dissolve the yeast in the water in a small bowl, set aside. In the bowl of a stand mixer (preferably a Bosch) using the paddle attachment, cream the butter and honey.
- Add the eggs and mix until combined. Add the milk, vinegar, and yeast mixture. Stir until combined.
- Stir the flour and measure 3 cups into a bowl. Stirring helps incorporate air into the flour so you don’t get a dense bread. Add the salt and stir it into the 3 cups of flour. Switch to the dough hook and add the remaining flour, mixing for 5 minutes until a soft dough is formed. The dough may look sticky, but if touched your finger, should come away clean.
- Pour 1 Tbsp of oil into a large bowl. Scrape dough out of the mixing bowl, and into the bowl with the oil. Flip the dough over so all sides of the dough have oil on them. Cover with plastic wrap and let rise for 1 hour in a warm place.
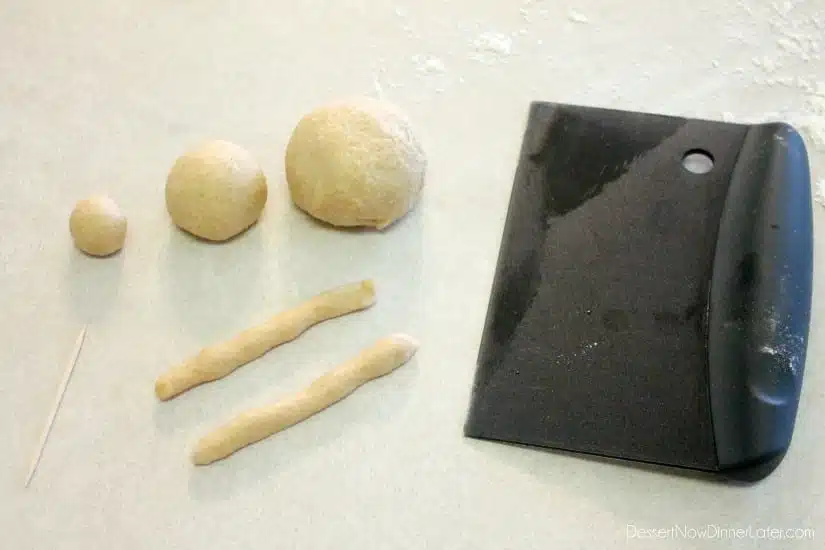
- Turn the dough out onto a lightly floured surface. You will need one large roll (2½-inches round), one medium roll (1¼-inches round), and one small roll (½-inch round) for each bunny’s body and then two (2½-inches long) “snake” shaped pieces of dough for the ears. Keep the unused dough covered with a towel or greased plastic wrap while you work on each bunny.
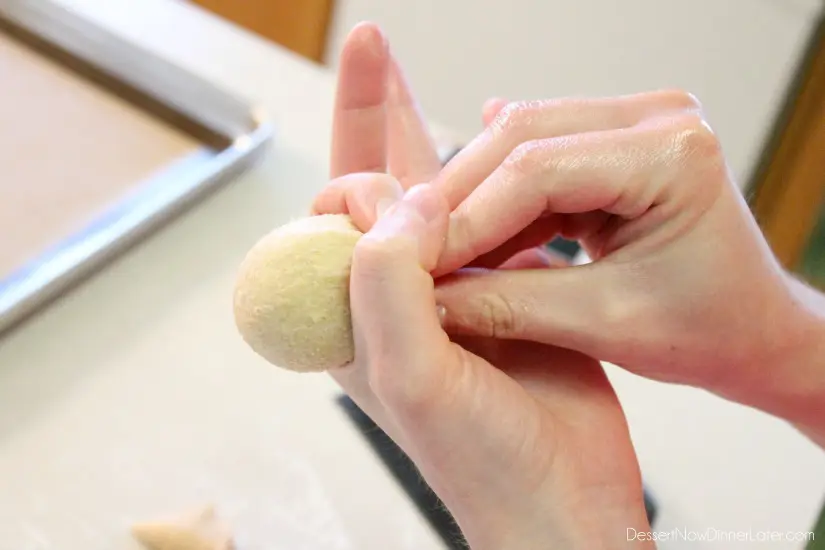
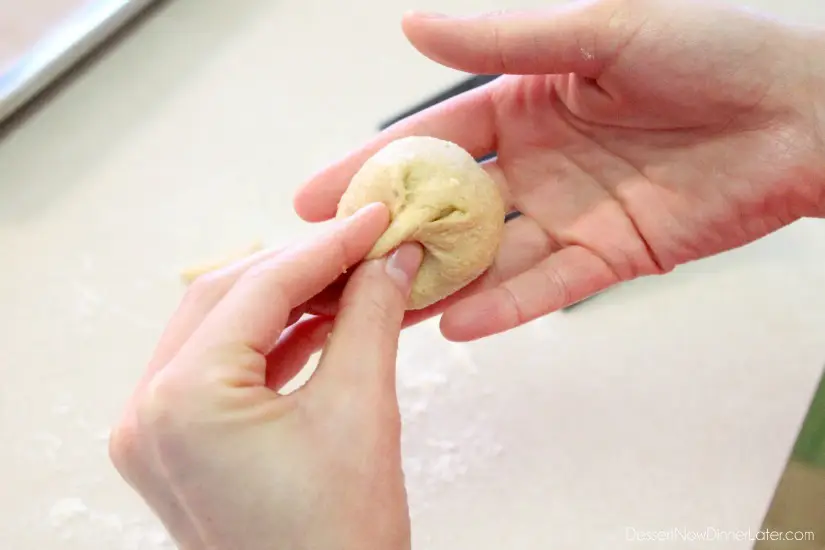
- Shape rolls into round, seamless pieces by creating a circle with one hand, touching your thumb and pointer fingers together. Push the dough through the center of the circle with your other hand. Finish pinching the bottom of the roll together.
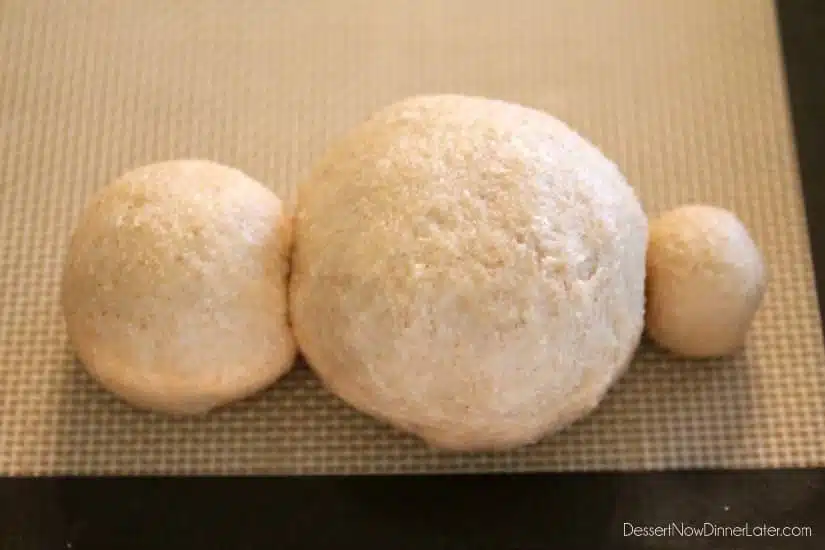
- Use large (2½-inch) rolls for the body, medium (1¼-inch) rolls for the head and small (½-inch) rolls for the tail. Place the pinched sides of the rolls on the bottom, touching the baking sheet that has been sprayed with pan spray, lined with parchment paper, or lined with a silicone baking mat. Place the 3 rolls side-by-side, touching each other, with the largest roll in the middle, so as the dough rises, they will stick together.
- Loop the pieces for the ears and press them against the body and on top of the bunny’s head with a toothpick that has been dipped in flour. Dip the toothpick in flour again and poke two holes for eyes.
- Keep the finished bunnies covered with plastic wrap that has been sprayed with pan spray as you work, so they don’t dry out. Repeat with the remaining dough to create as many bunnies as you can (about 16 to 20 bunnies), spacing them a couple inches apart on prepared baking sheets. Keep the bunnies covered with the greased plastic wrap, and let the dough rise for 1 hour or until double in size.
- Bake at 350 degrees Fahrenheit for 20 to 25 minutes or until the tops are golden brown. Remove from the oven and brush melted butter over the top. Enjoy Warm!
Notes
Did you make this?
Don’t forget to leave a rating below and make sure to follow on Pinterest and Instagram for more!
Recipe altered from An Oregon Cottage and edited in my own words. Bunny inspiration from Lunches Fit For a Kid.
Let’s make some bunny rolls!
Save This recipe
Enter your email below to get a link to this recipe emailed straight to you to save later! Plus be signed up for all new recipes.
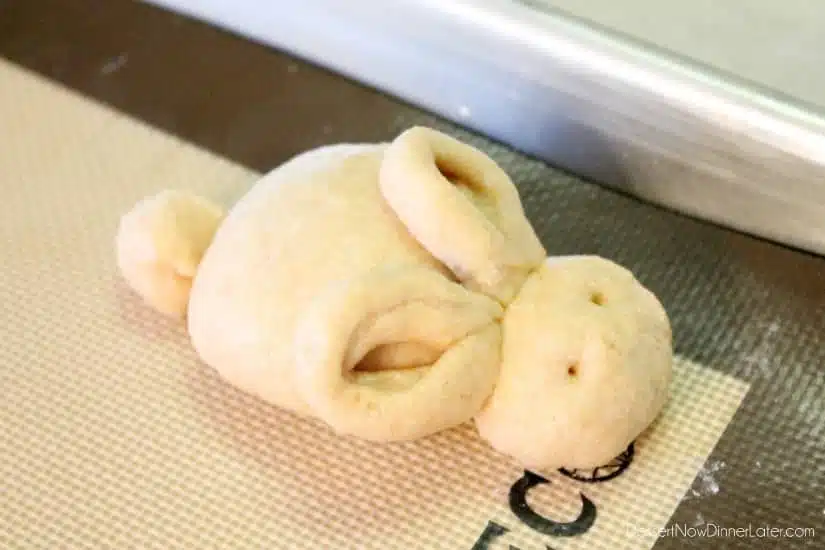
Turn the dough out onto a lightly floured surface. You will need one large roll (2 1/2-inches round), one medium roll (1 1/4-inches round), and one small roll (1/2-inch round) for each bunny’s body and then two (2 1/2-inches long) “snake” shaped pieces of dough for the ears. Keep the unused dough covered with a towel or greased plastic wrap while you work on each bunny.
Shape rolls into round, seamless pieces by creating a circle with one hand, touching your thumb and pointer fingers together. Push the dough through the center of the circle with your other hand.
Finish pinching the bottom of the roll together.
Use large (2 1/2-inch) rolls for the body, medium (1 1/4-inch) rolls for the head and small (1/2-inch) rolls for the tail. Place the pinched sides of the rolls on the bottom, touching the baking sheet that has been sprayed with pan spray, lined with parchment paper, or lined with a silicone baking mat. Place the 3 rolls side-by-side, touching each other, with the largest roll in the middle, so as the dough rises, they will stick together.
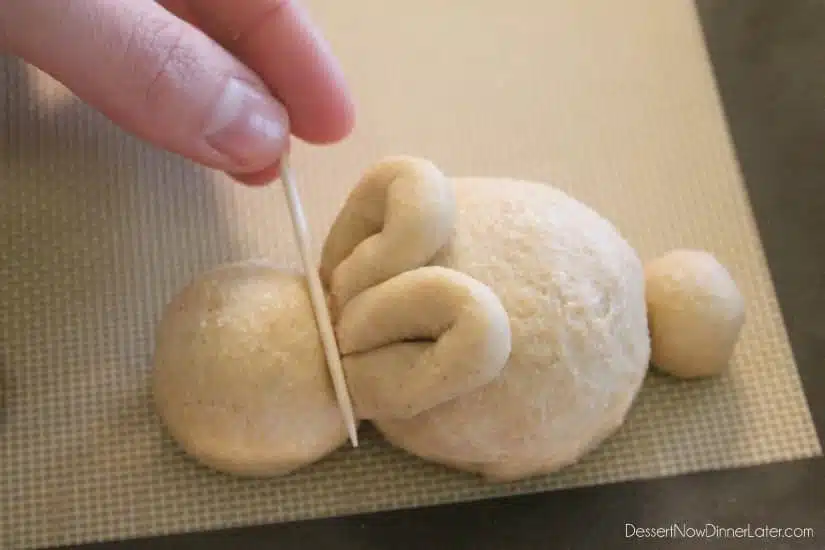
Loop the pieces for the ears and press them against the body and on top of the bunny’s head with a toothpick that has been dipped in flour.
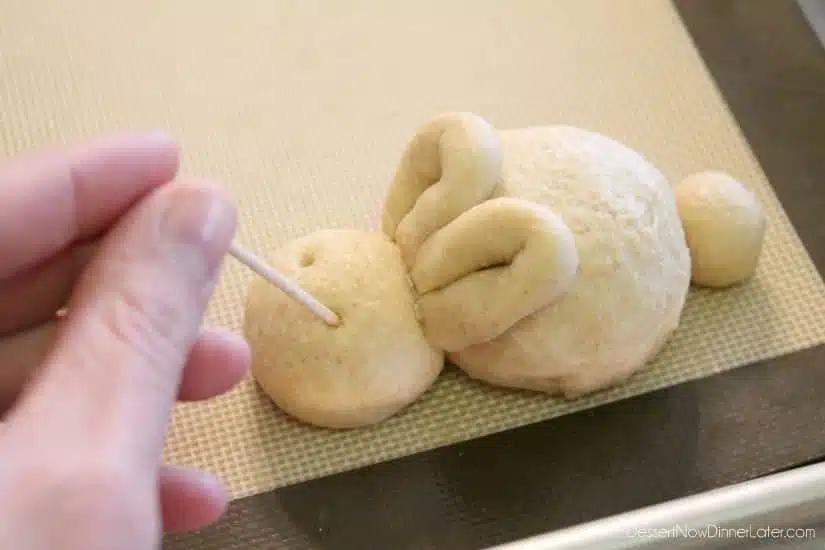
Dip the toothpick in flour again and poke two holes for eyes.
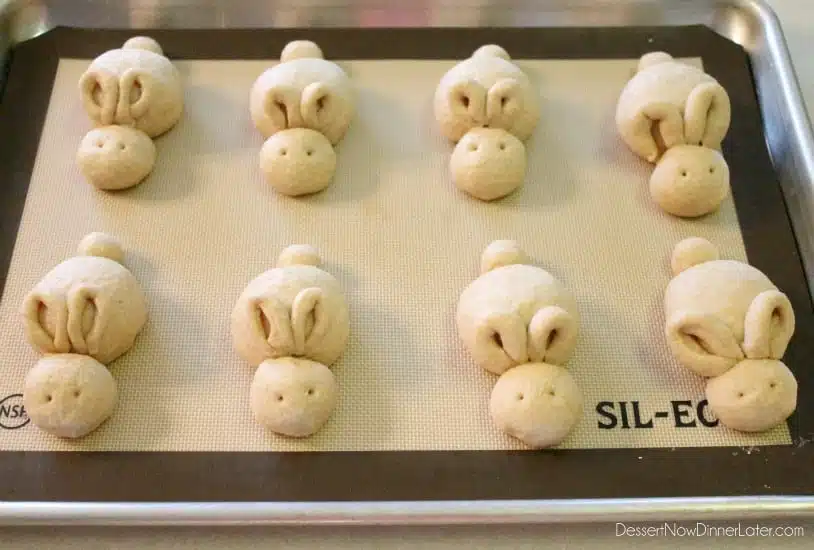
Keep the finished bunnies covered with plastic wrap that has been sprayed with pan spray as you work, so they don’t dry out. Repeat with the remaining dough to create as many bunnies as you can (about 16 to 20 bunnies), spacing them a couple inches apart on prepared baking sheets. Keep the bunnies covered with the greased plastic wrap, and let the dough rise for 1 hour or until double in size.
Bake at 350 degrees Fahrenheit for 20 to 25 minutes or until the tops are golden brown. Remove from the oven and brush melted butter over the top. Enjoy Warm!
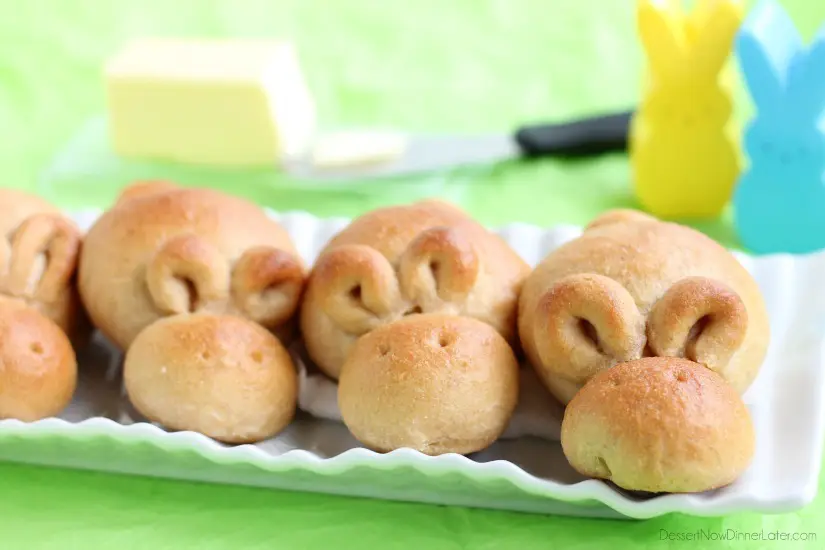
Too complicated and time consuming? Try these easy Fluffy Whole Wheat Bunny Rolls instead.







These are adorable, Amber. As you know (thanks for the Twitter love!), we included it in our Easter crafts blog last week: http://bit.ly/1ptsMbq
Thanks so much for sharing! They were fun to make 🙂
Thank you!:). My grand kids are in college so we don’t really do Easter Basket’s anymore. ( do one big one:). I thought how fun these would be. Thanks so much for the ideas:)
You’re very welcome! Enjoy!
These are absolutely the cutest ever! Can you make them the day before? How would you keep them as soft as when made!
Absolutely! There are two ways you can do it. You can prep and shape the dough, cover it with plastic wrap that has been greased with pan spray and leave it in the fridge to rise overnight and bake first thing in the morning OR you can bake them off and keep them stored in a zip-top bag. Then you would just need to zap them in the microwave right before eating (20-30 seconds or more if you have a lot). Nuking them in the microwave works just fine; that’s how I eat them the 2nd and 3rd day. Warm and soft like they came right out of the oven! Enjoy! 🙂
This is the cutest thing I have ever seen. I’ll definitely be making these for Easter 🙂 Found you @ Six Sisters Stuff Link Party
Thanks for stopping by! And I hope your family enjoys the bunny rolls 🙂
These are so soooo cute! I’m loving the tutorial!
Holy crap! Those are too cute! Maybe even too cute to eat.
Super cute. I love that it’s a festive, savory recipe.
These are perfection! Perfect for Easter
Thanks Courtney! I’m hoping many homes have bunny rolls with their dinner this Easter!
These are soo adorable. I’ve always wanted to try them out, and with your tutorial maybe I’ll do it this year! Pinned!
Have fun with them!
These are the cutest!! Probably more time-consuming than I’m willing to endure, but I love them. They’re so adorable. I’m going to check out your other bunny roll recipe 🙂
Yes, these are cute, but definitely take more time, which is why I have the other bunny roll option as well. Thanks for stopping by Holly!